
OpenID Connect is an identity layer built on top of the OAuth 2.0 protocol. It allows applications to verify the identity of users based on the authentication performed by an external provider. This is especially useful when you want to secure applications without managing your own user credentials. Keycloak is an open-source Identity and Access Management (IAM) solution that makes it easy to set up a robust OpenID Connect provider.
In this article, we'll discuss how to connect your own python flask application to any OpenID Connect provider and how to configure your own with Keycloak. You’ll configure a Keycloak server, register an OIDC client, and build a simple Flask application that authenticates users through Keycloak using industry-standard protocols.
By the end of this guide, you will have:
- A working Keycloak instance running in Docker
- A Flask application secured with OpenID Connect
- A complete login and logout flow
- A structured and scalable Flask project architecture
This setup is ideal for developers looking to add authentication to their Python web apps using modern identity standards.
Prerequisites
Before you begin, here are the basic prerequisites to use this guide:
With both tools in hand, we can safely start our project.
Understanding what is Open ID Connect ?
If you are already familiar with OpenID Connect, you can pass this section. If you aren't or want a refresher on the concept, this section will give you a quick overview of how OpenID Connect works, why it’s useful, and what role it plays in securing your application.
So OpenID Connect is built on the open Oauth2 protocol. It is a globally adopted web standard used by major tech players like Google, Microsoft, and Apple. It enables user identity verification by relying on the identity and authentication services of an external provider.
This approach eliminates the need for a dedicated user database, simplifying the way you implement authentication and authorization in your apps.
Fully interoperable, OpenID Connect operates through a RESTful HTTP interface with JSON formatting. Chances are, you already use this standard daily—any time you click a “Sign in with Google” button instead of entering separate credentials, you're leveraging OpenID Connect.
Now, if you aren't familiar with Oauth2 protocol either, here is the detailed flow of information that happens when you use OpenID Connect.
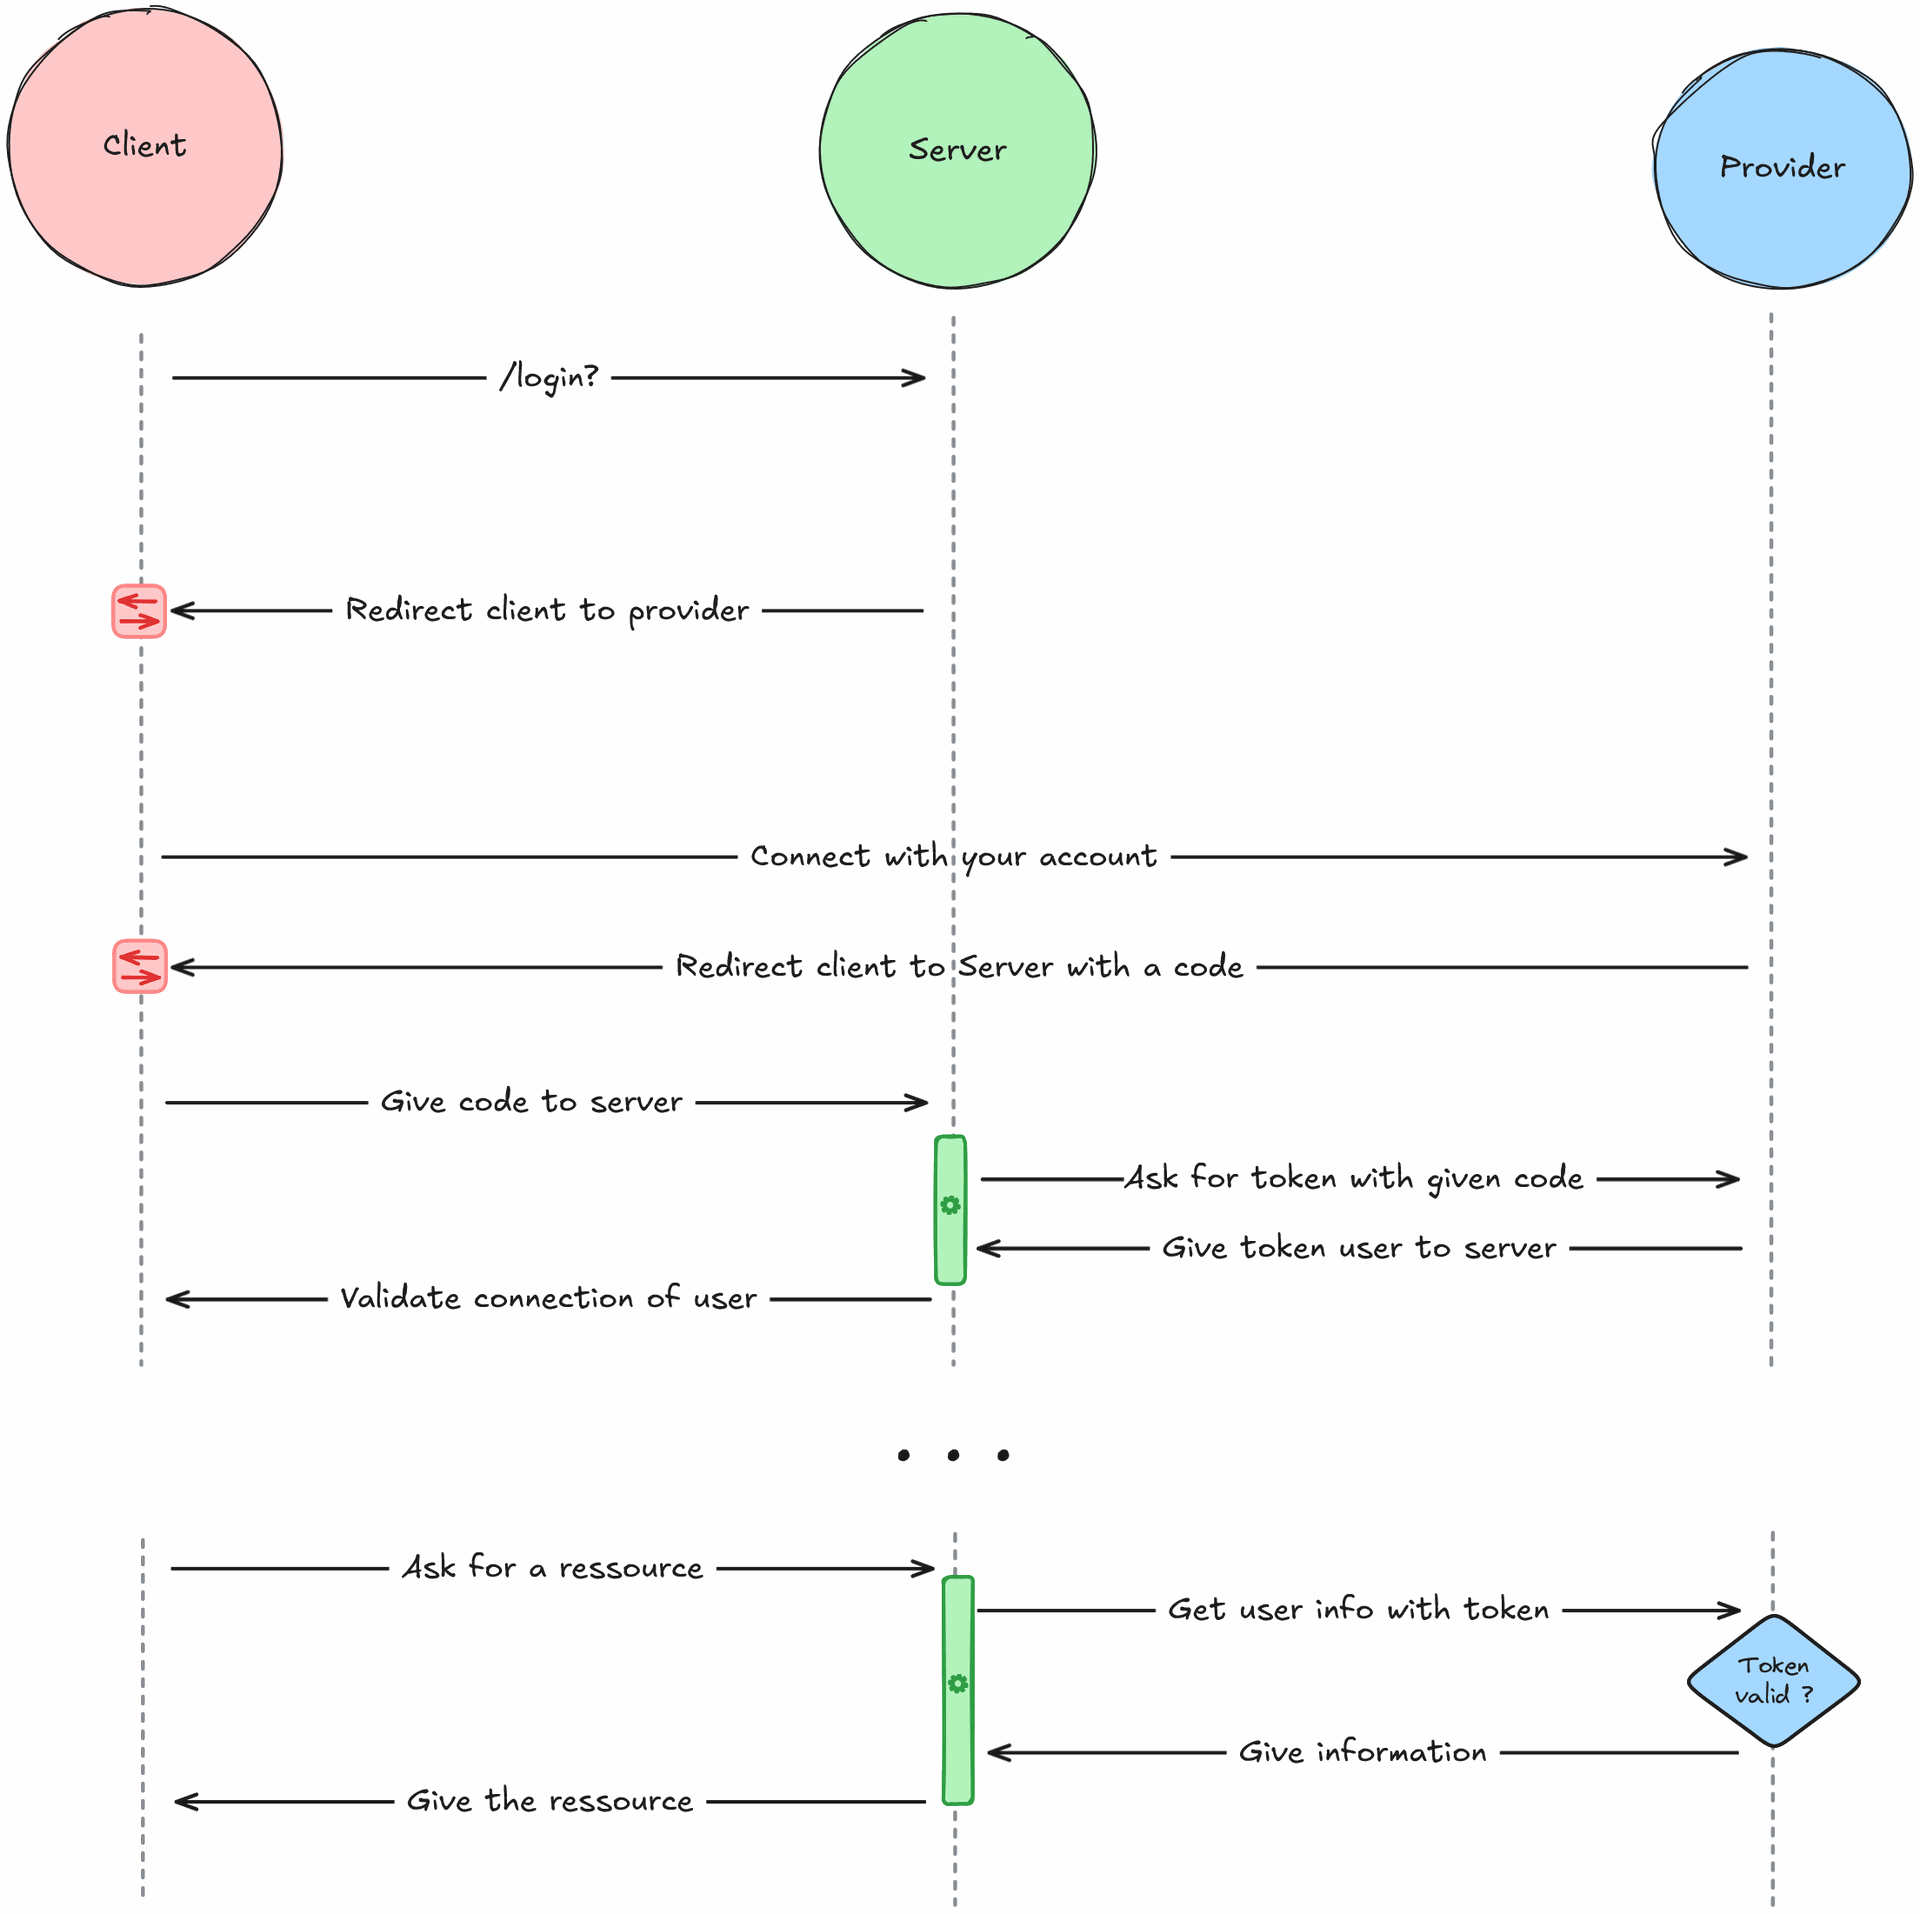
When you log into the service, you are first redirected to the provider to authenticate with your account. A code or proof of authentication will be given to you in exchange, which you will give to your service. This service can then exchange the code for a token with the provider, which will represent your identity.
Each time the service will need to get information about your profile, it will ask the provider for the information and give you access to resources accordingly to your identity.
This is called the authorization code flow of OpenID Connect. By this design, the token is never exposed to the frontend, reducing the possible angle of attacks and identity thefts.
What is Keycloak ?
Keycloak is a fully open-source identity and access management solution that provides all-in-one support for authentication and authorization. Designed for flexibility, it enables developers to secure applications with minimal effort, offering features like single sign-on (SSO), social login, and user management out of the box.
We will use Keycloak to play the role of the Identity Provider in our project. With it, you will be able to create and manage your users, fully customize the authentication flow and link your users to all your projects faster. This solution is also lightweight and scalable thanks to its clustering ability if you plan to implement it on bigger projects.
All configurations will be done through this admin console, so no specialized skills are required to use it.
Configure Keycloak
The first step of this guide is the configuration of Keycloak. For this we will use Docker as this facilitate the installation step.
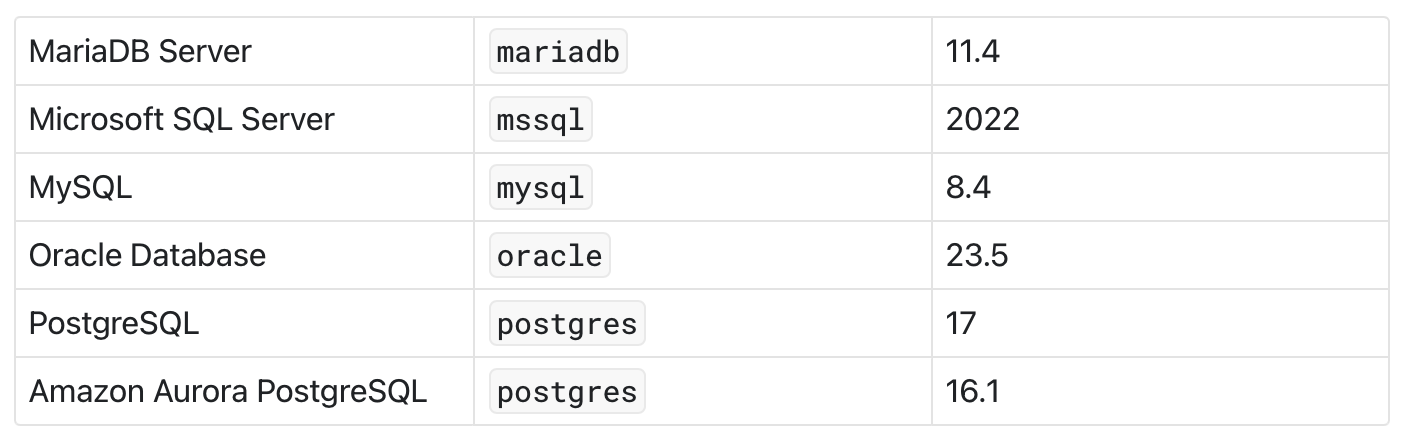
To work, Keycloak need to store its data in a database. For this article, we will use Postgres, but you can use any database in the following list:
To orchestrate all configuration, we will use the following docker-compose.yaml:
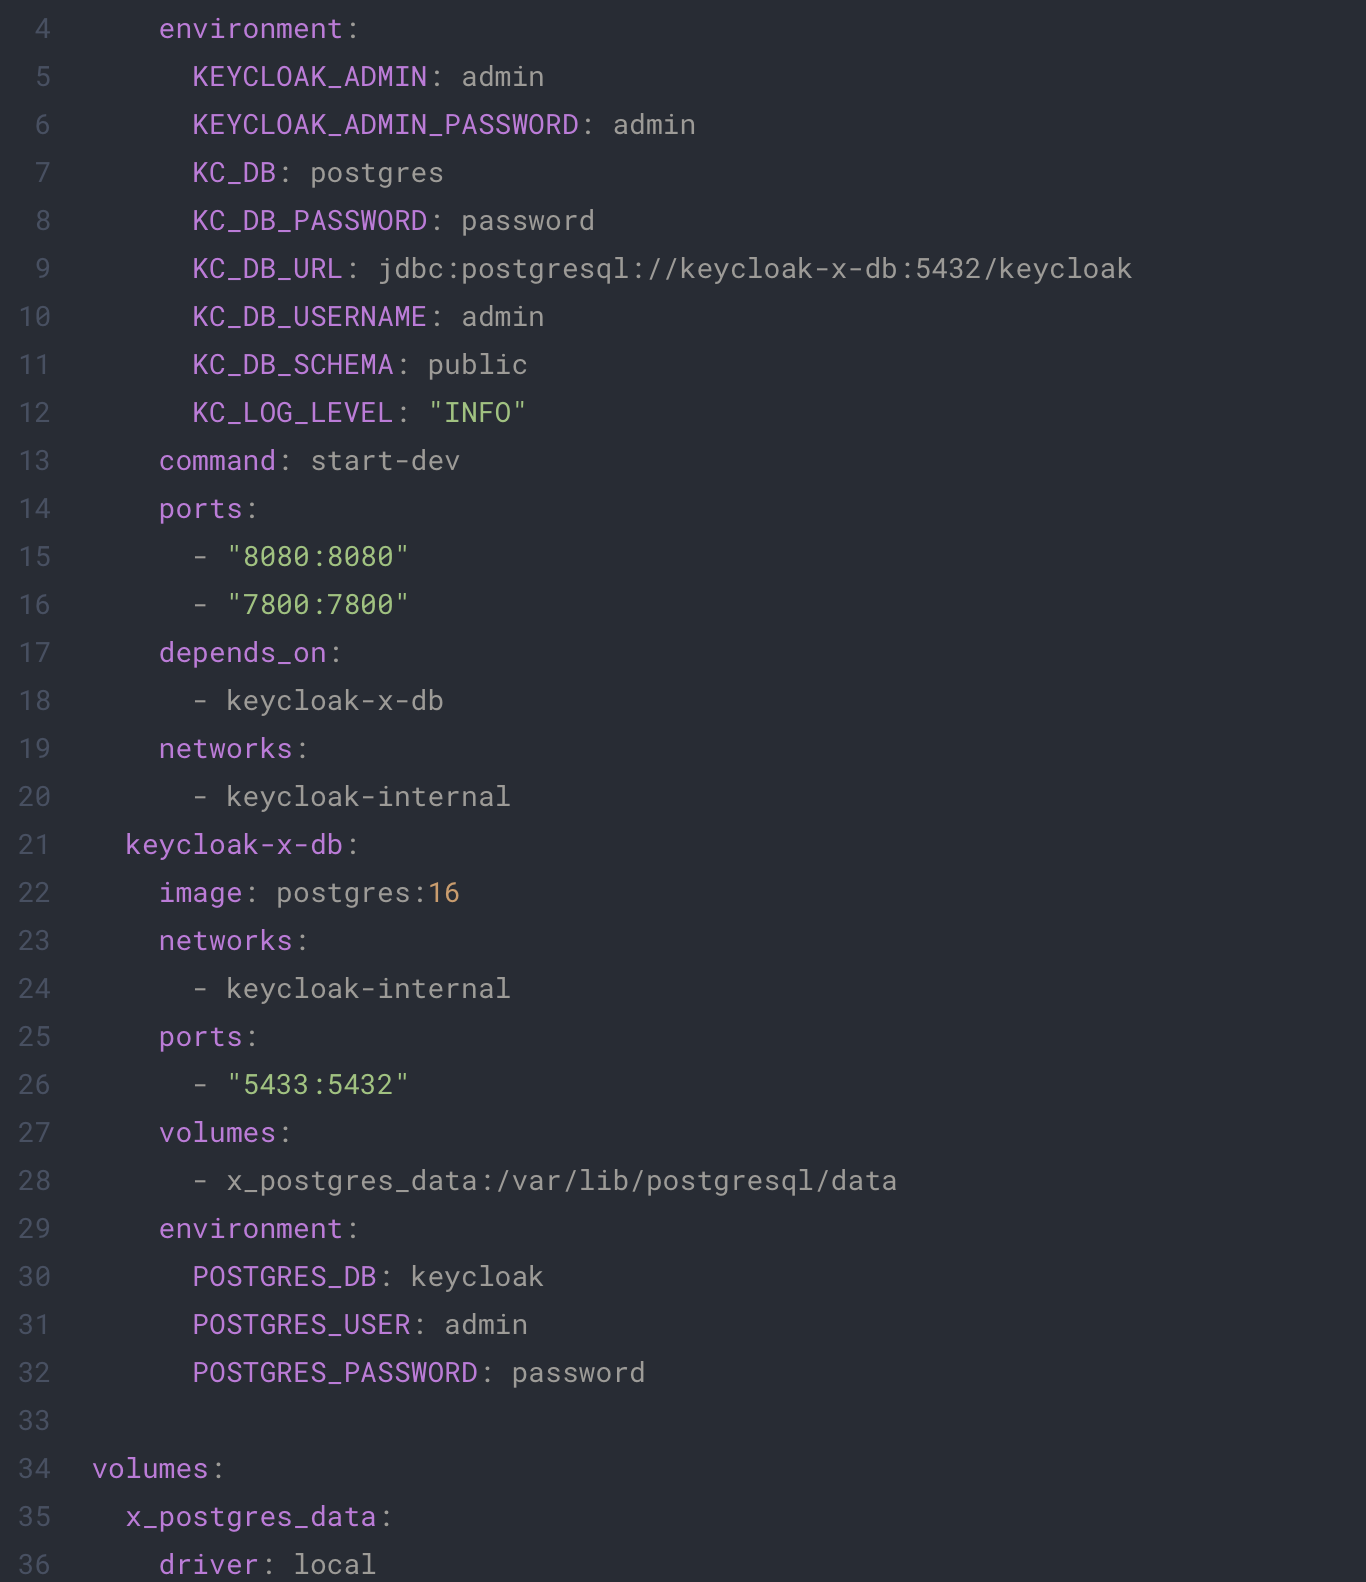
This file is the configuration of your Keycloak and Postgres environment, be sure to change the user and password parameters accordingly to your preferences.
Run the following command to launch a basic instance of Keycloak on your machine.
docker-compose up
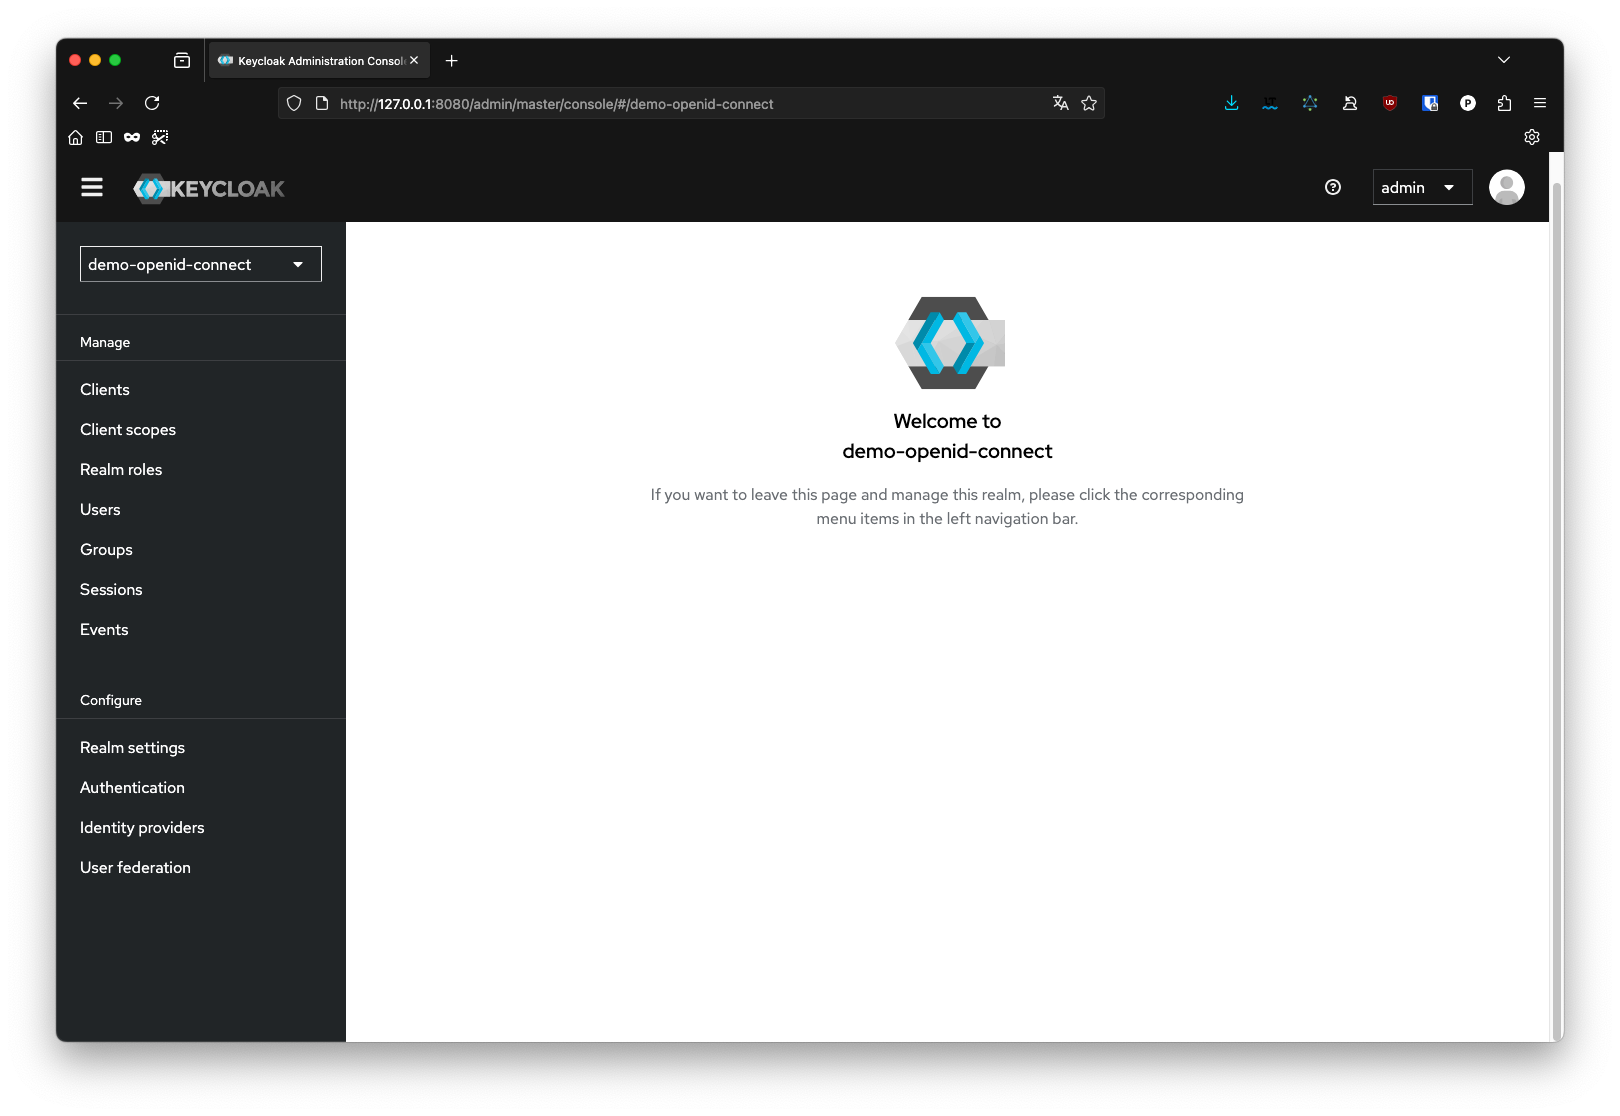
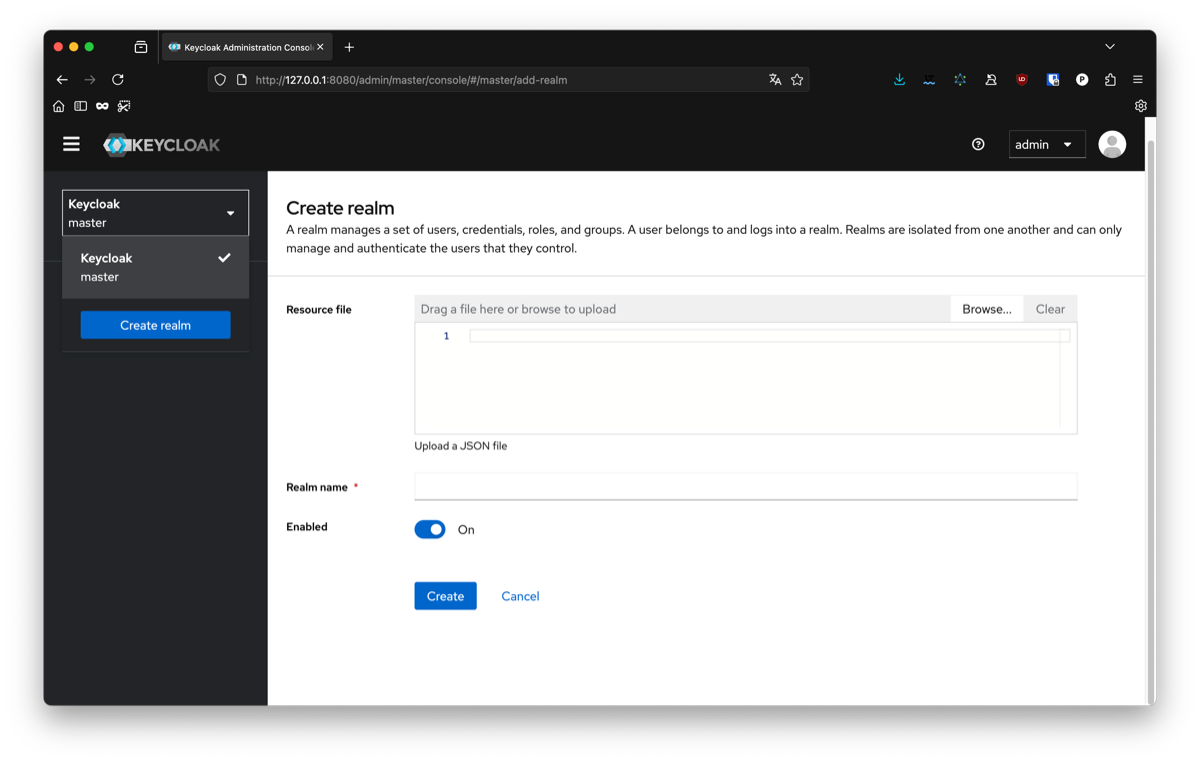
Once the container is fully started, you can access the admin console at the following address: http://localhost:8080. You can connect to the administration console and should get to this page:

From this console, you can administrate all your connexion, users, clients, and more…
First we will create a realm for our app, for this you can click on the list of realms on the top left. We don’t have a current configuration so we will just create an empty one. For this article I will name it demo-openid-connect.
In Keycloak, a realm is like a container that holds all the users, applications, and settings for a specific project or environment.
The next step is to configure an OpenID client that Python will use to connect with Keycloak. In you newly created realm, go to client and create a new one.
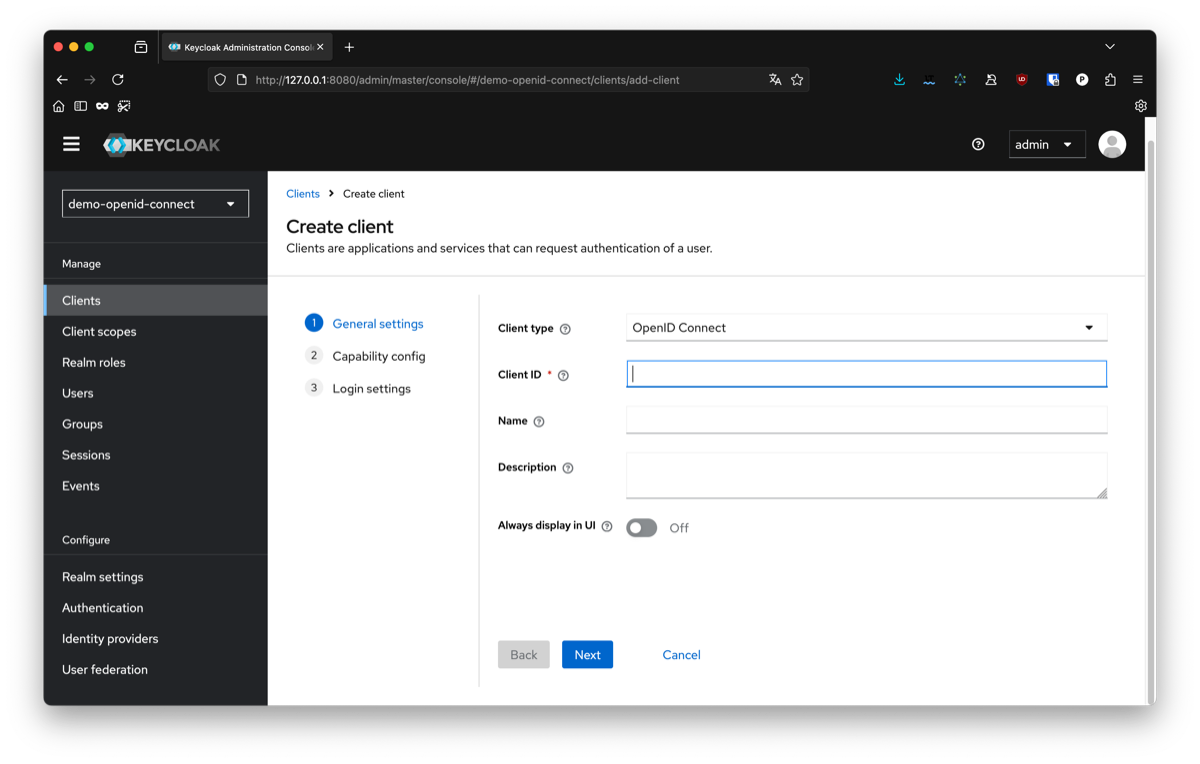
You will need to configure the following parameters:
- client type : OpenID Connect You can choose between SAML or OpenID Connect, in this article we will focus on OpenID Connect.
- client id : 7f3c2e10-8c1a-4c71-89f2-f0bb72e536f4. The id of your client, it will be needed later to connect to it. You can choose anything, for this example I chose a random uuid.
- ame : open-id-client The name of your client. This is only use to identify your client on keycloak, you can choose anything.
- client authentication : toggle to true Enable to authorize opined flow on this client.
- root url : http://localhost:8081 The root url of you application. For this example we will use a local instance on port 8081.
- home url : / The home of the application, since our application will be at the root url, we will just put '/'. If you want to run it under a specific path, you can update this
- alid redirect urls : * For this example, we will allow any url from our domain to act as a redirection from our client. In production, you should change this to a more specific url to restrict your client to your own application only.
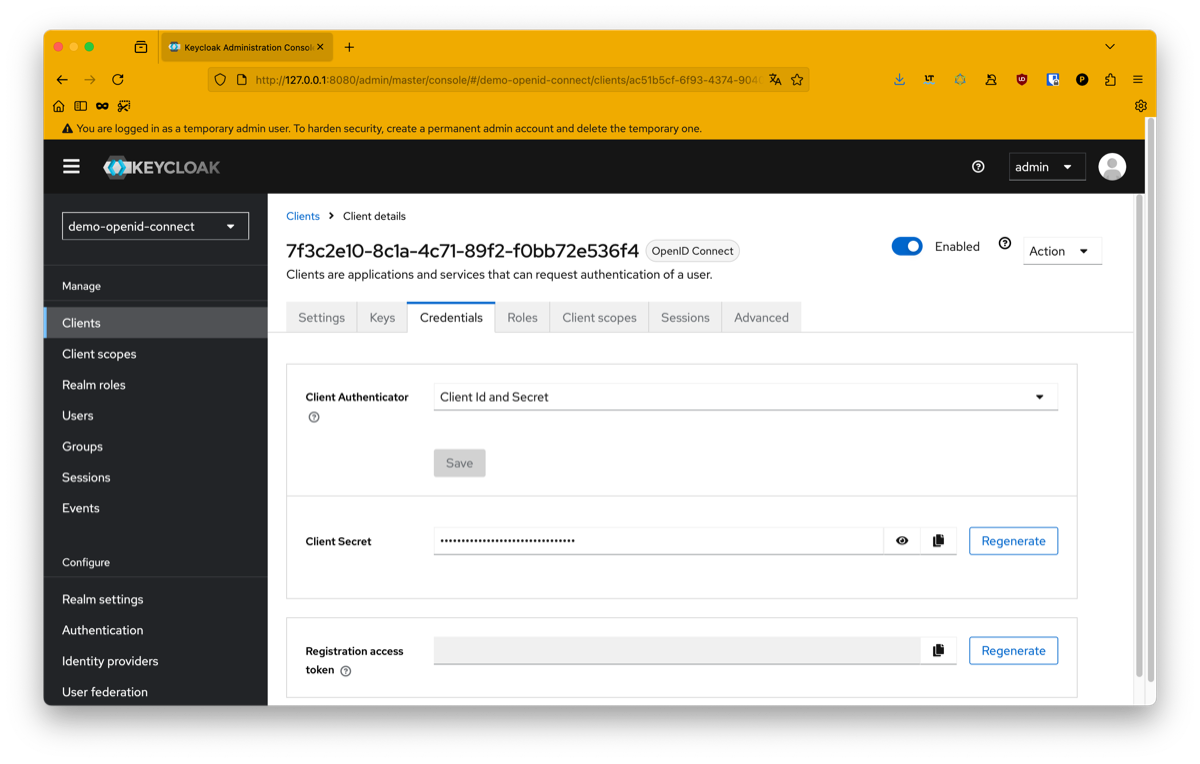
Finally you will need to configure a secret for your client. For this you can go in the credential tab and copy it. It should look like something like this: 961jZtg26dDrLcUacShPyYRvUEAhQEA4.
This secret is the proof your app will use to authenticate to keycloak. You have to be careful not to share it and save it in an unaccessible place like a secret manager or an environment file.
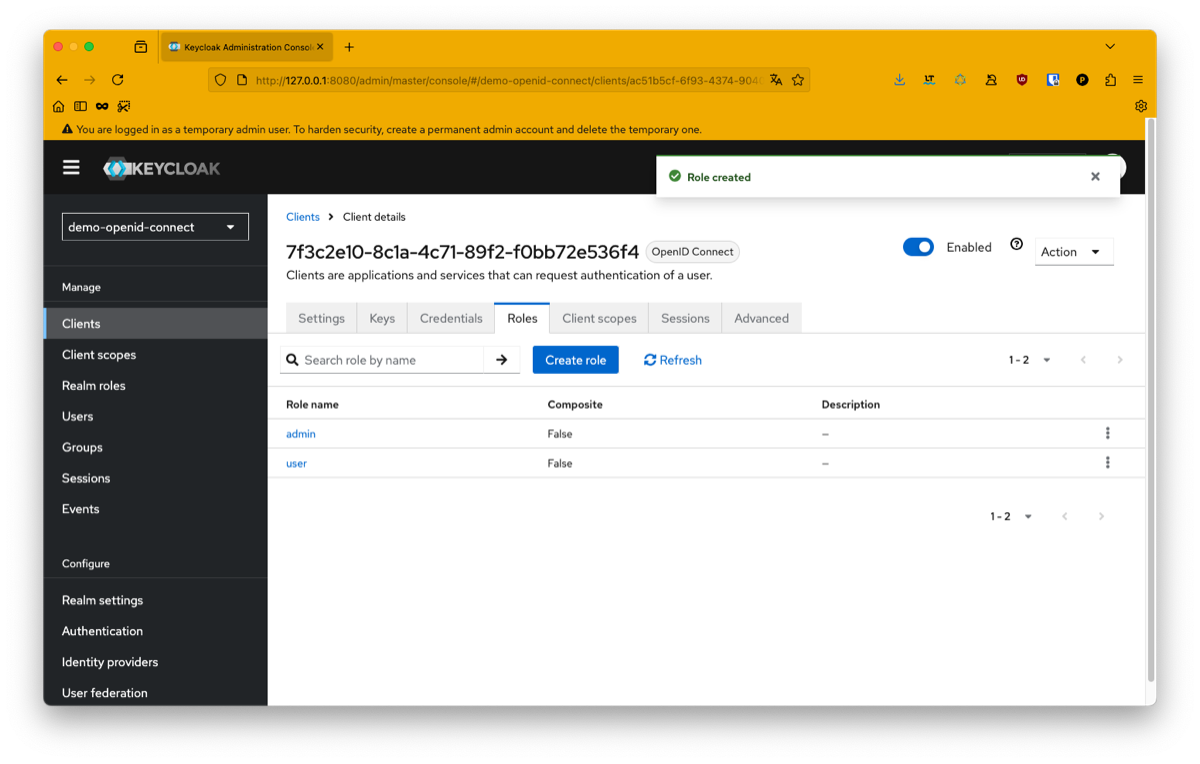
You can also configure custom roles for your application if you need to:
Switch to python
Our keycloak is now ready for our Python application to use. We will now build our python application. For this we will use Flask, be aware you can use any other http server for this.
What is Flask ?
Flask is a minimalist web framework written in Python. It allows you to quickly spin up a web server and expose endpoints for your application. It’s lightweight, simple to use, and well-suited for building REST APIs or small web services.
Here’s a basic example of a Flask application:
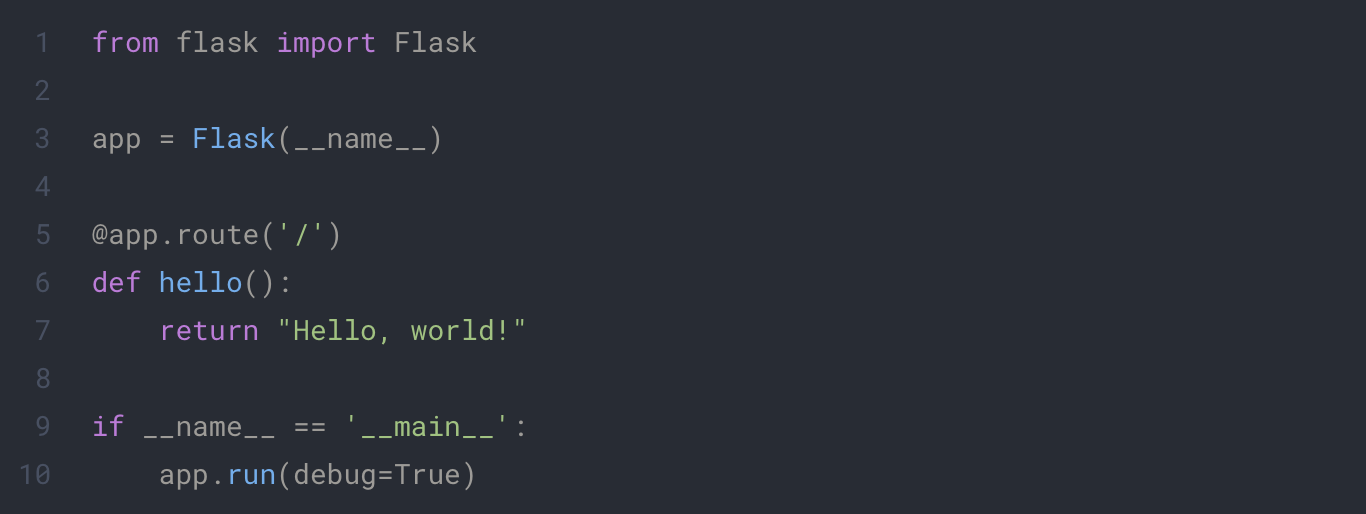
In this example we launch a web server and create an endpoint at the path /. To run this application, simply save it in a file (for example app.py) and execute it with Python:
- python -m pip install Flask
- python app.py
You can now go on your chosen web navigator to http://localhost/. You should see the text Hello, world!.
You can now go on your chosen web navigator to http://localhost/. You should see the text Hello, world!.
The power of Flask is to render html template and inject your own data. We will update our script a little bit to make a basic example, but first we will need to organize our project a little bit.
If you followed every steps, you should have something like this:

The recommended structure we will use for a Flask project is the following:
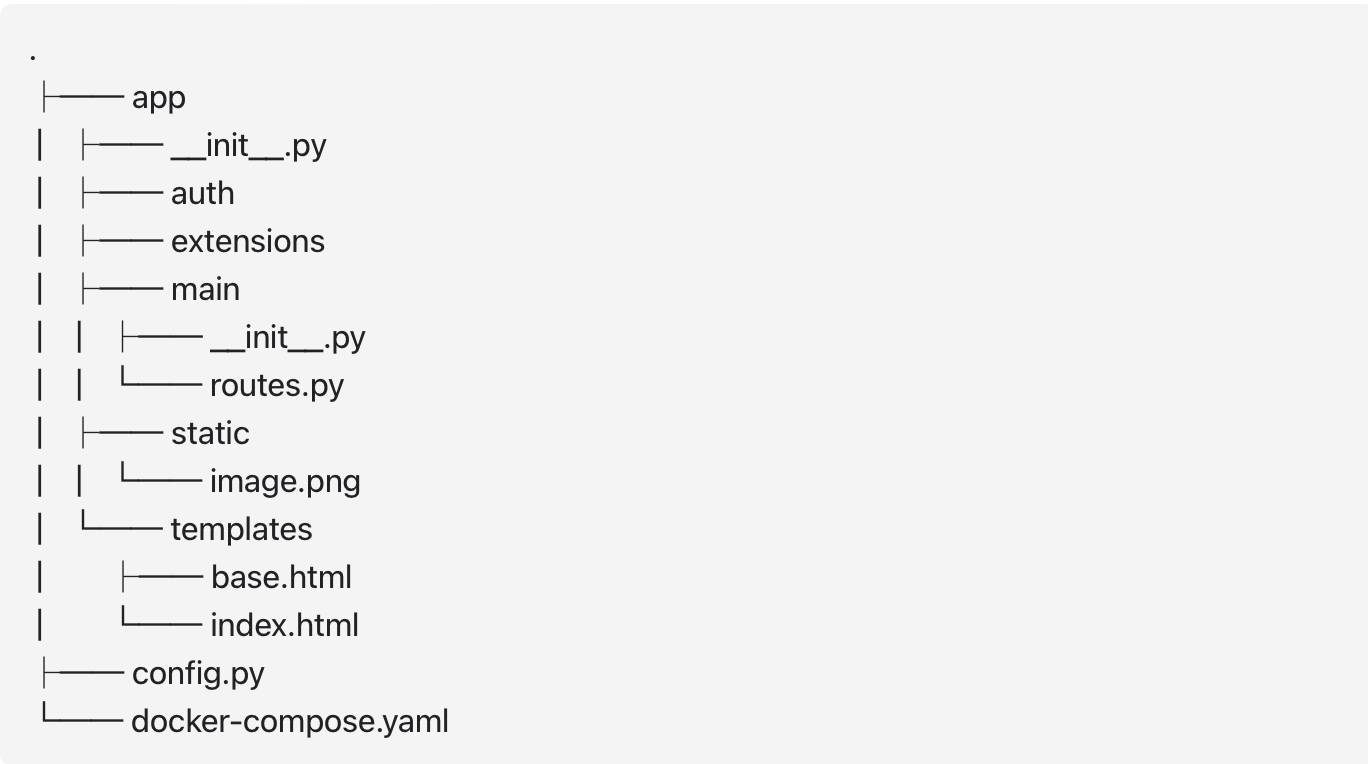
Description :
- App : This folder is the root of your project. Everything related to Flask will be placed inside.
- __init__.py : This file name convention from python allow us to use directory paths directly as path for the python file inside it like it would work with index.html on the web. The one at the root will contain the configuration of your Flask app.
- routes.py : This file will contains every endpoint in the folder and implement the logic behind. In bigger project you could place the logic in a dedicated services.py file.
- config.py : This file will contains the configuration of your Flask app and import your environment variables.
- Extensions : This folder will contain all python script you need in your app that isn't directly related to Flask like a database connexion for example.
- Main : This folder contains all main endpoint of our app.
- Templates : This folder contains all html files that will be used by Flask and need data injection.
- Static : This folder contains all static data of our project, such as images, css, script, and more.
To execute our app we will now execute the following command:
flask --app app run --debug --port=8081
The content of each file will look like this:
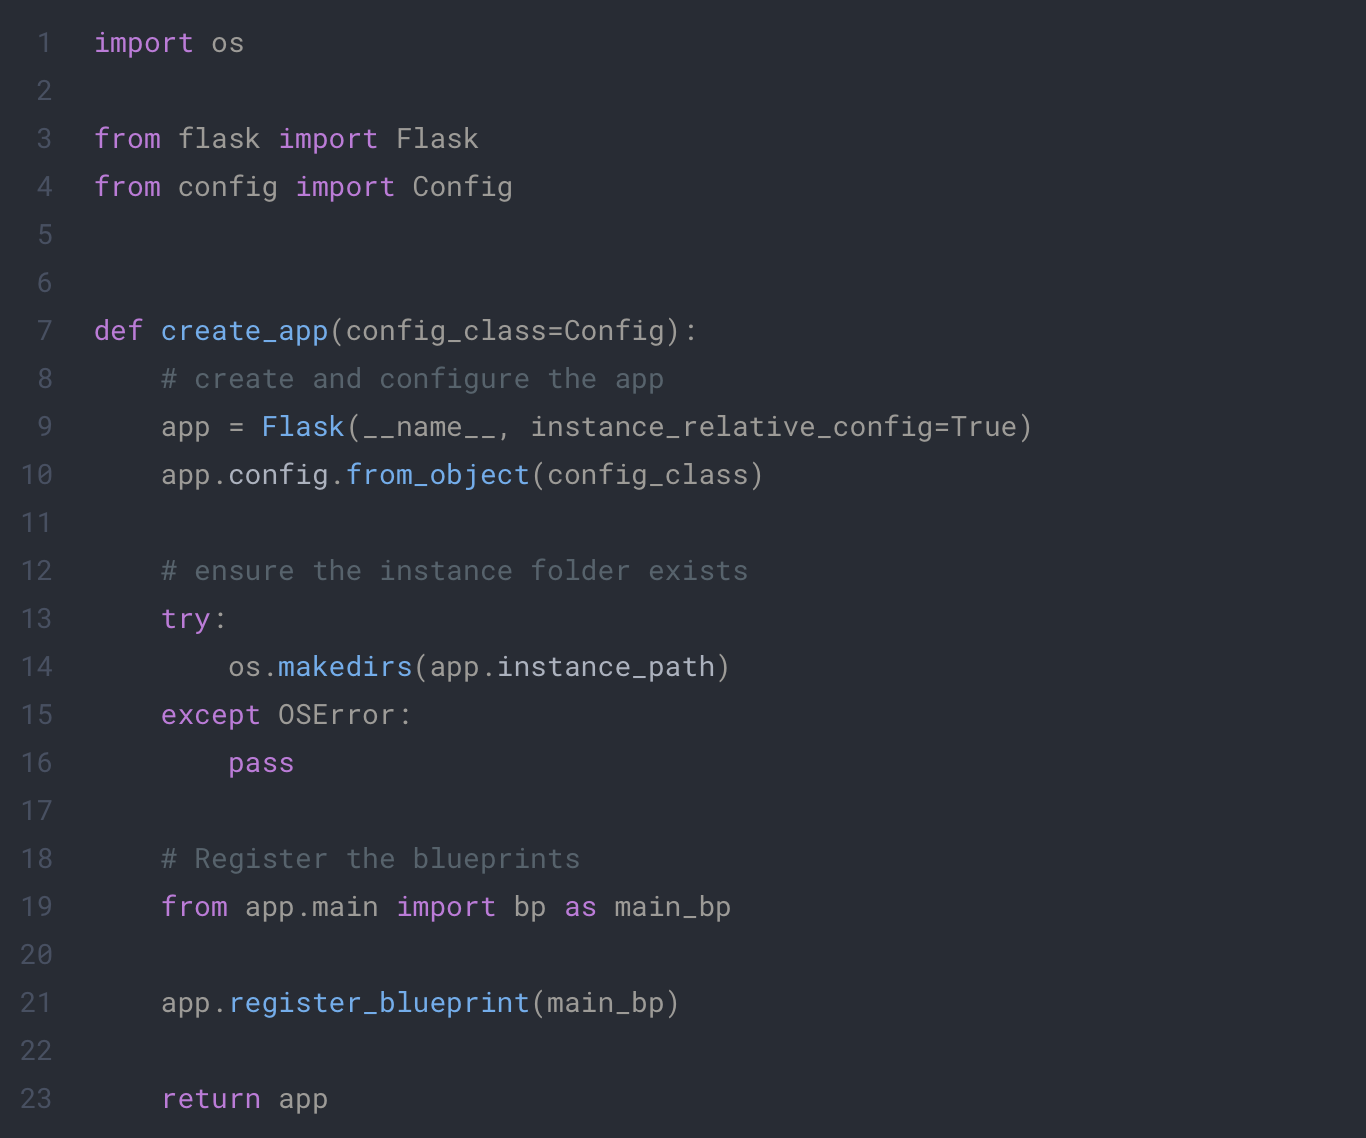
app/__init__.py
config.py

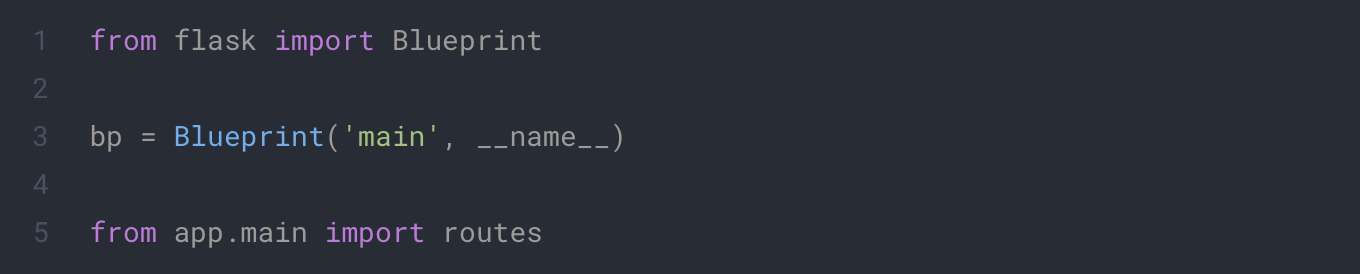
app/main/__init__.py
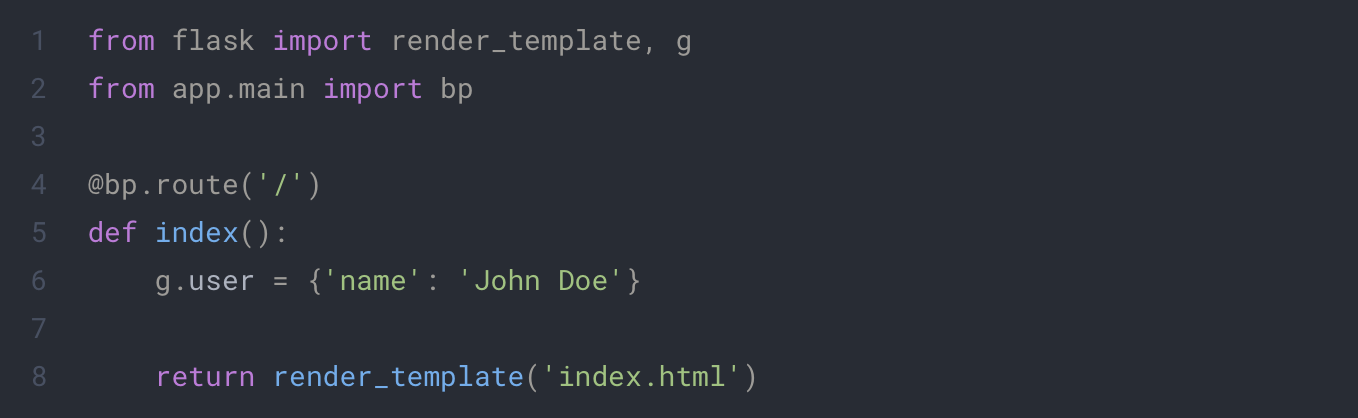
app/main/routes.py
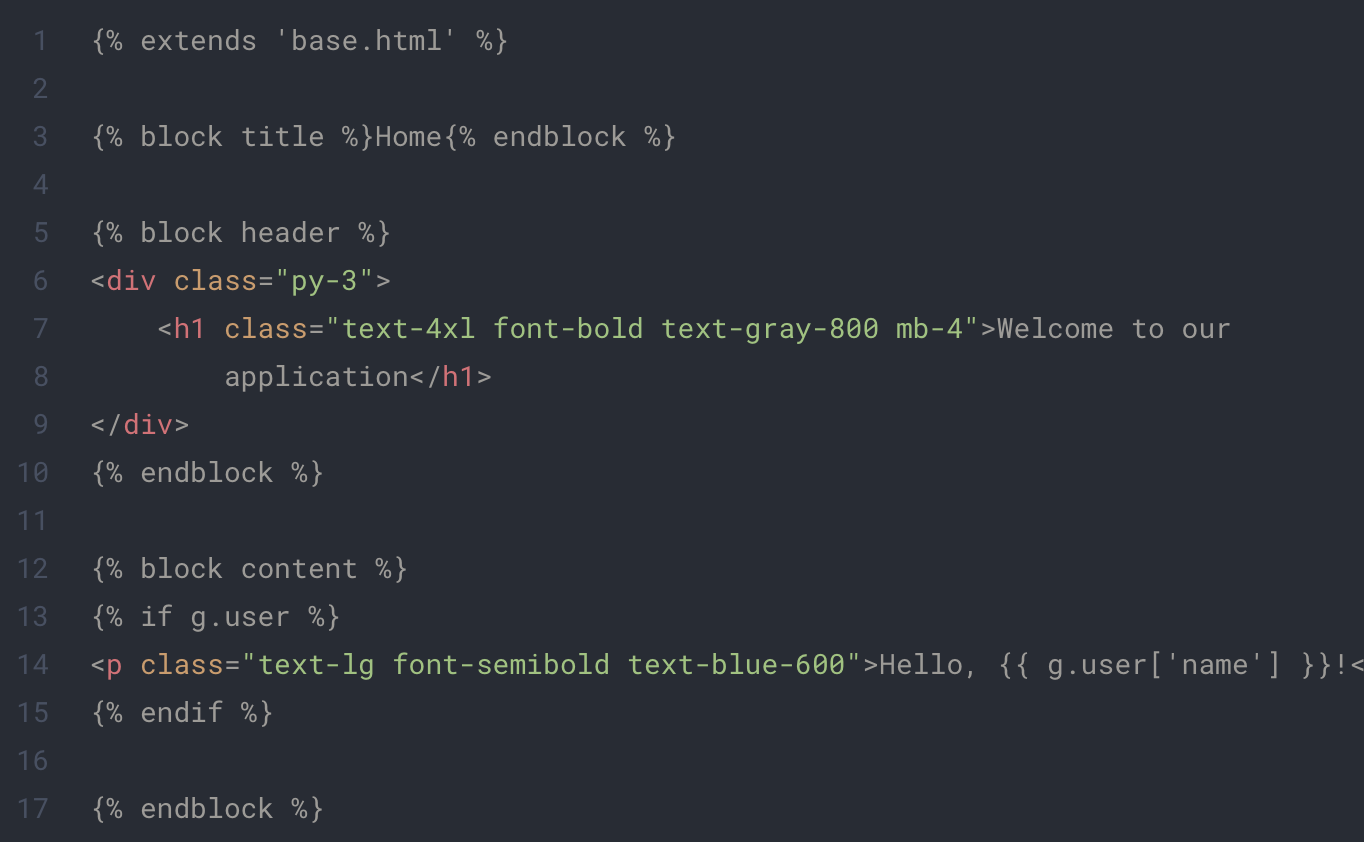
app/template/index.html
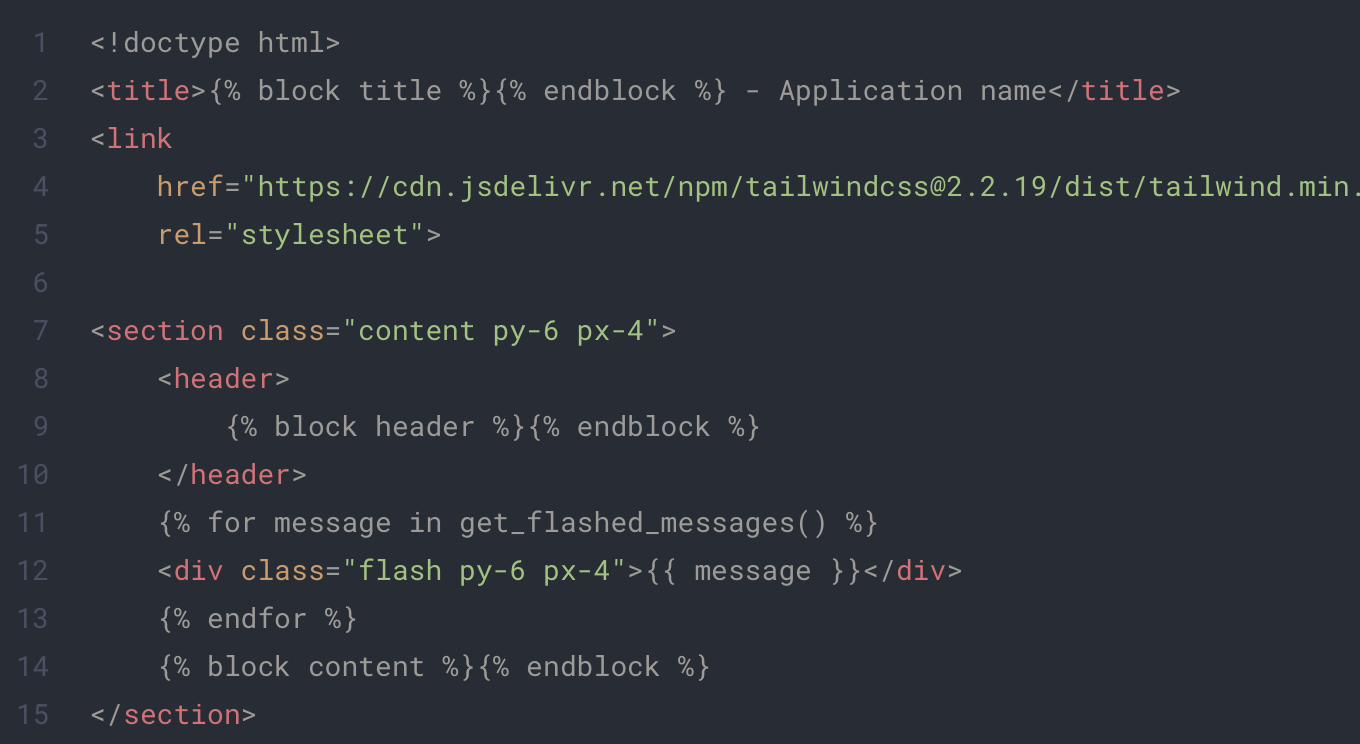
app/base/base.html
There are a lot of new concept here:
First Blueprint. In Flask, you can create Blueprint to group your endpoints. Each folder with routes will represent a Blueprint in our project. For now we only need the main one.
Second Templates, as aboded before you can use template in Flask made from html and Jinja2. To learn more about it, you can check the Flask documentation. In this project we have two html file :
- base.html : It will contain everything we want to share between our page such as tailwind import in our case.
- index.html : This will contains the content of the home page of our app.
To launch your newly created app you can use the following command:
- flask —app app run —debug
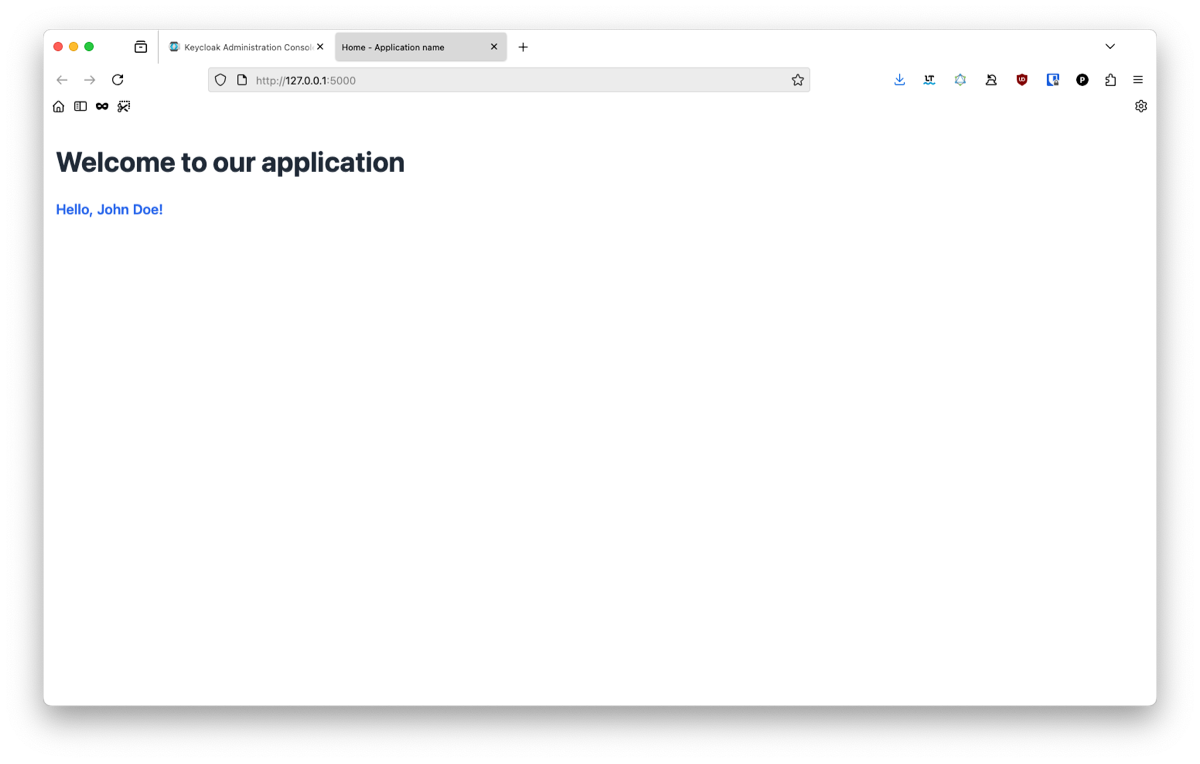
You can see the result of your application at http://localhost:8081/.
 Know that you are familiar with Flask and project organization, we will start to develop the OIDC connector to Keycloak !
Implement OIDC with Flask
We will now implement Open ID Connect in our application. For this we will use the oic python library.
First we will put our environment variable in our config. For this you will need to add this to your config.py.
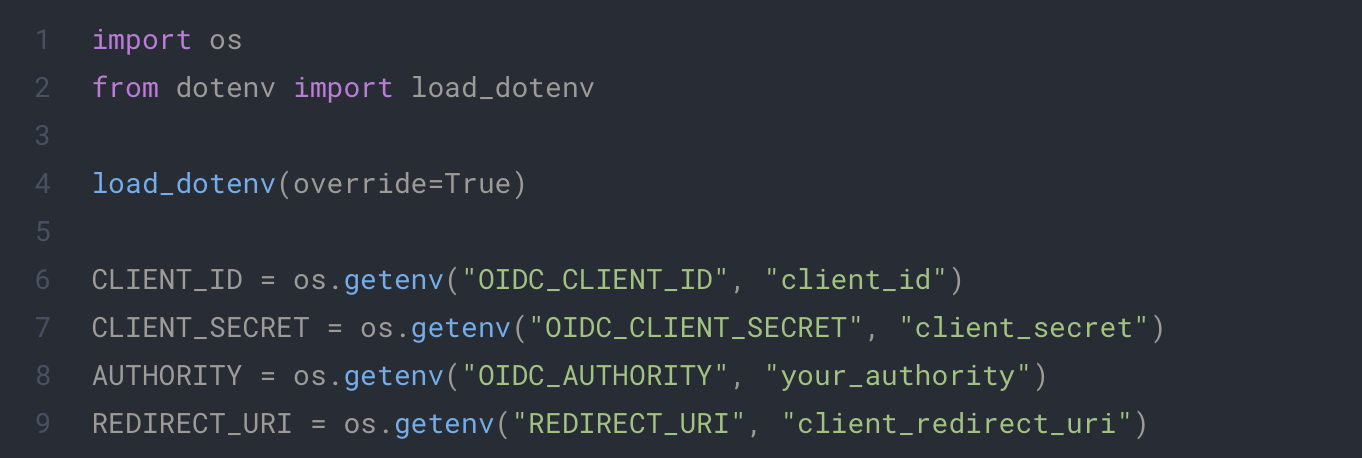
.env

Replace the appropriate variable with you own data. AUTHORITY represents the base url of your keycloak Open ID server. REDIRECT_URI represents the endpoint we will use in the future for our Open ID Connect flow.
The identity class
To easily reuse our identity script that will manage the Open ID logic, we will create a static class.
Here is the base of our class:
app/extentions/identity.py
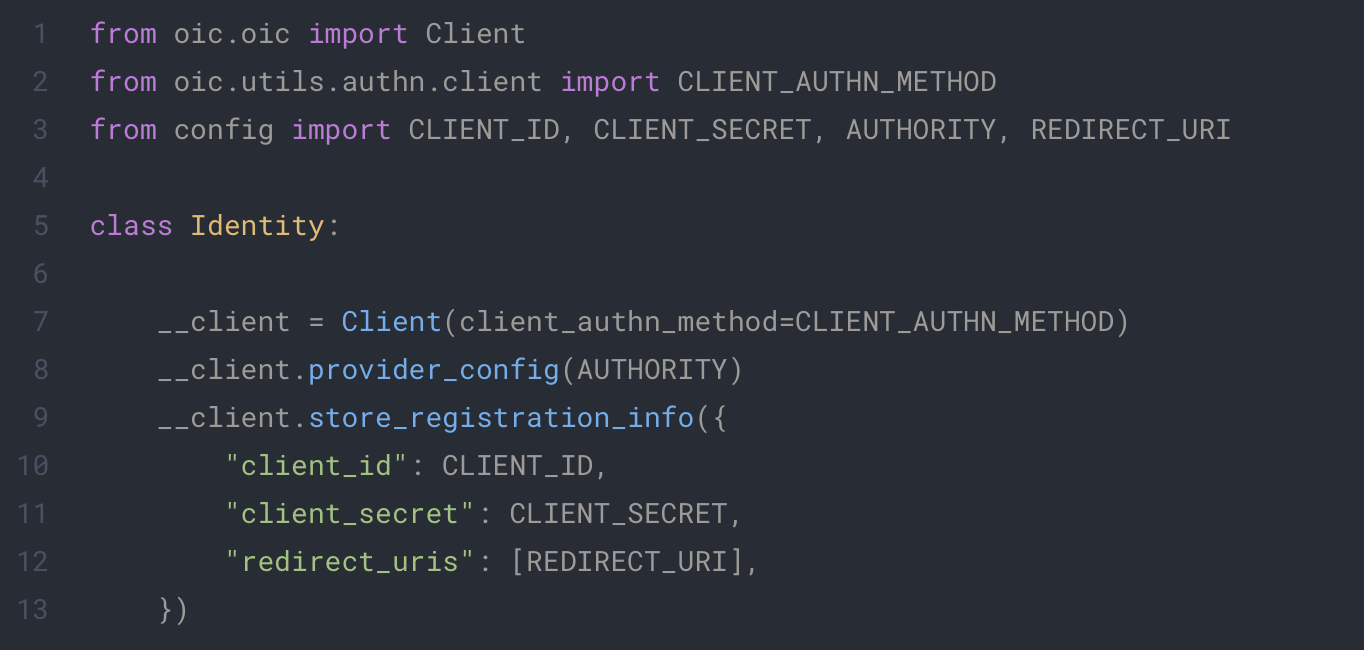
This class define a OpenID client and configure it with our environment. provider_config and store_registration_info will give the necessary information to our client to fetch all data it need to learn the urls of our keycloak endpoint.
We will now implement each step of the OIDC flow:
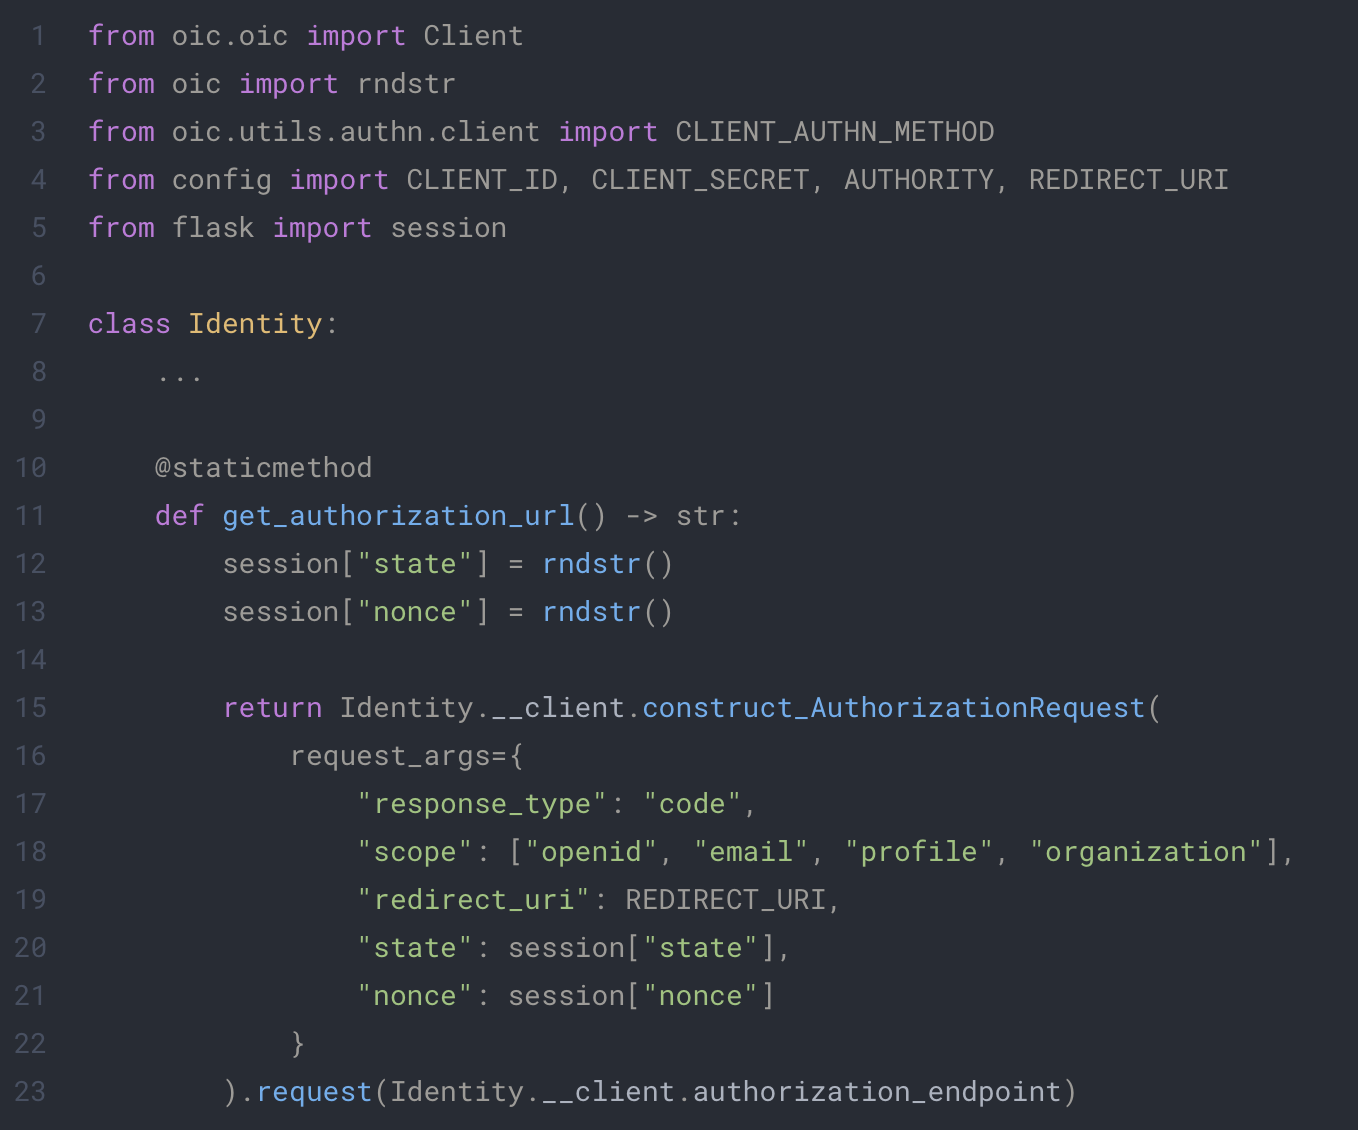
1. Get login url
To connect, the user will need to build an url with all informations about the connection request. This url is specific to each connexion and must give to keycloak:
- The redirection url of the request
- The authentication method and response type
- The scopes the user want to access
- State and Nonce, two random strings to identify the request
For this we will use the power of the oic that will make this much faster.
app/extensions/identity.py
2. Get the authentication token
The next step of the Open ID Connect flow is to retrieve the token of the user from the provider. For this we will once again make use of the oic library. This time we only need to send the following information to the provider:
- The code given by the user, proof of his authentication with the provider
- The redirect_url from which the server retrieved the code
app/extensions/identity.py
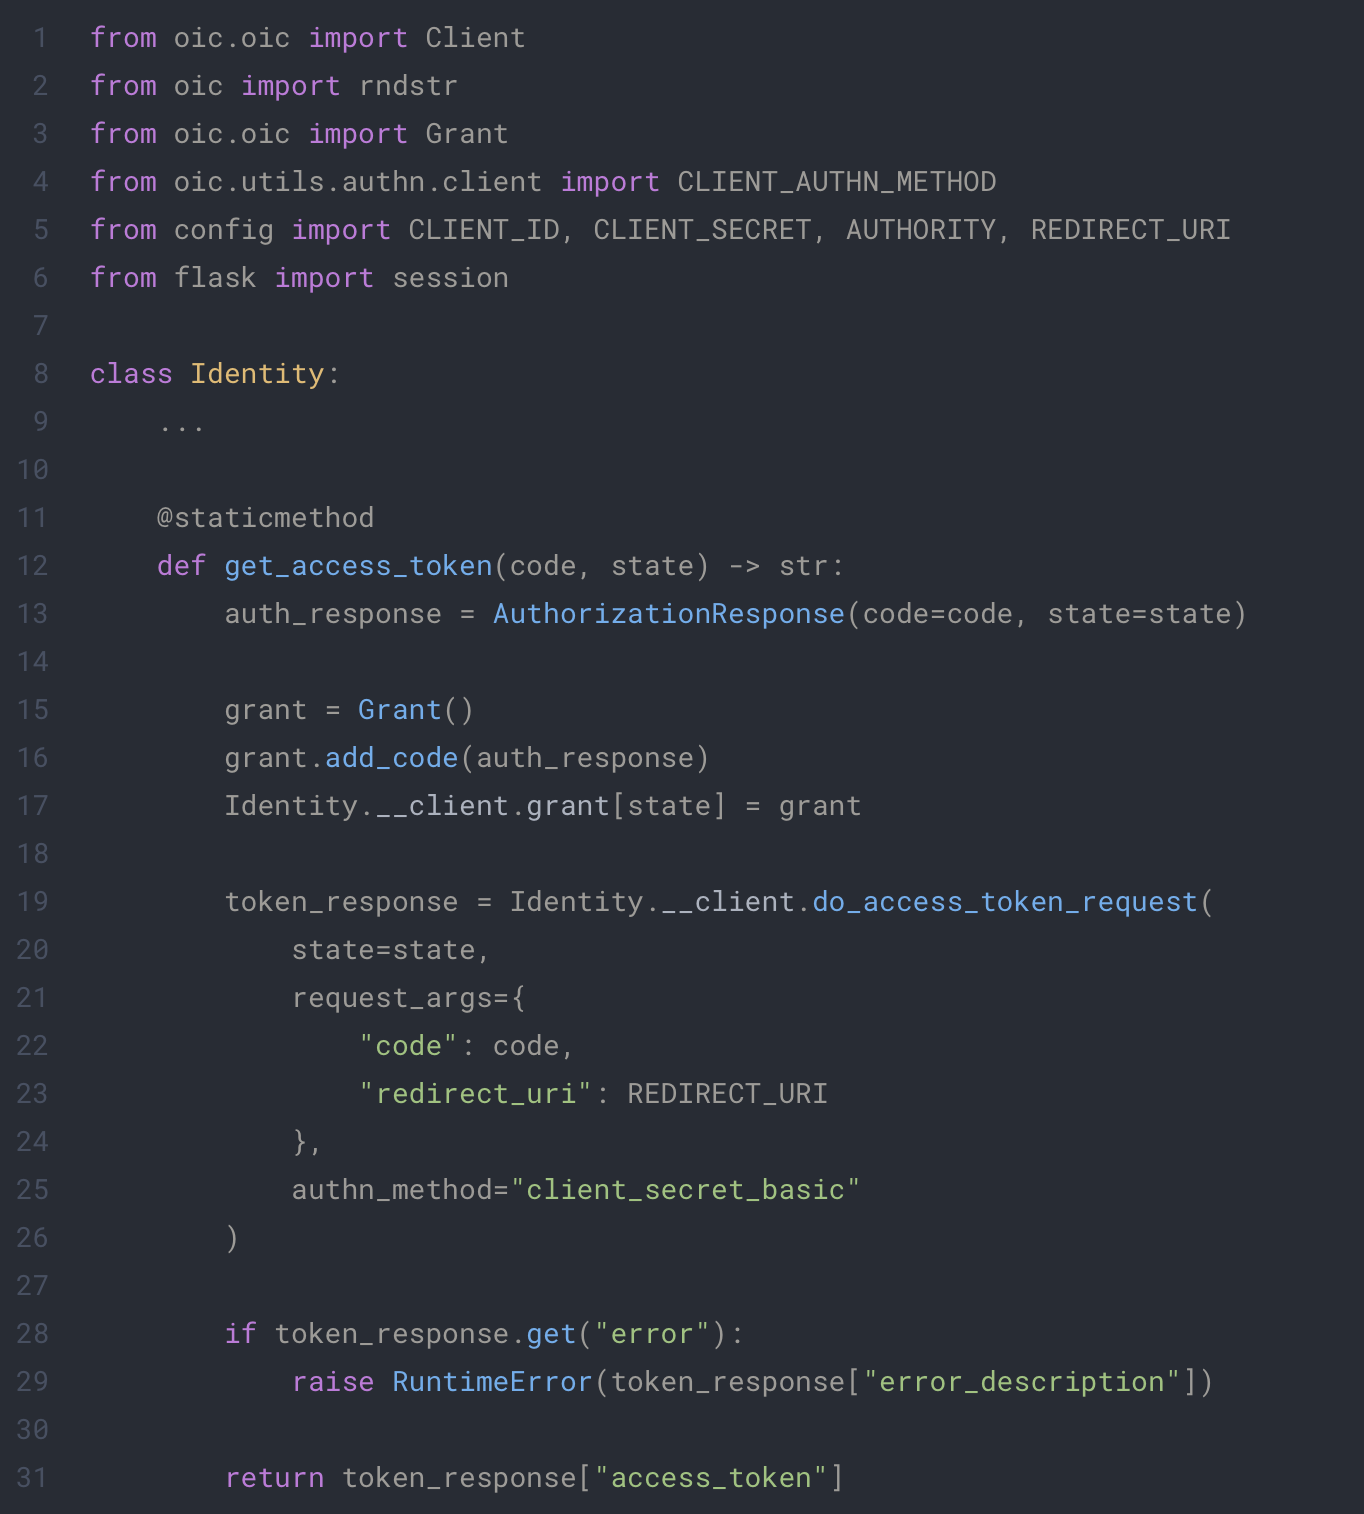
In this function, we will make a request to the provider with all information given from our client. We must create the Grant and add it ourself to the client for the request to be a successful. This retrieved token will be the proof of identity of our user.
We now have all we need to start implementing our endpoints and test out our OIDC.
3. Testing the authentication flow
For this we will create dedicated routes in a new folder with the two following files
app/auth/__init__.py
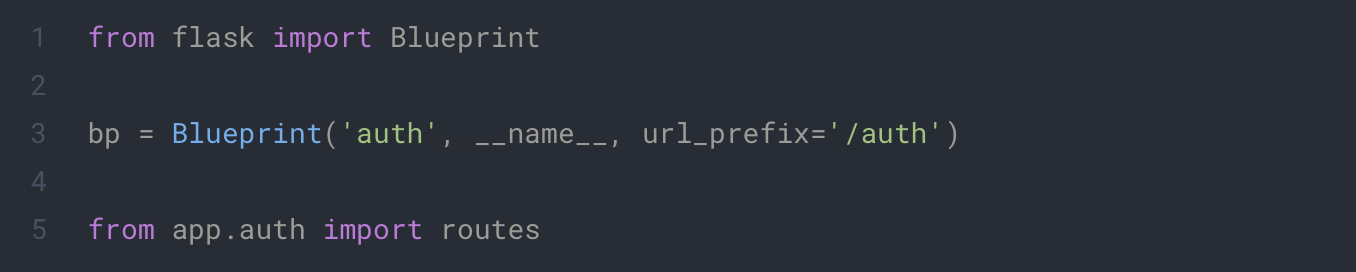
app/auth/routes.py
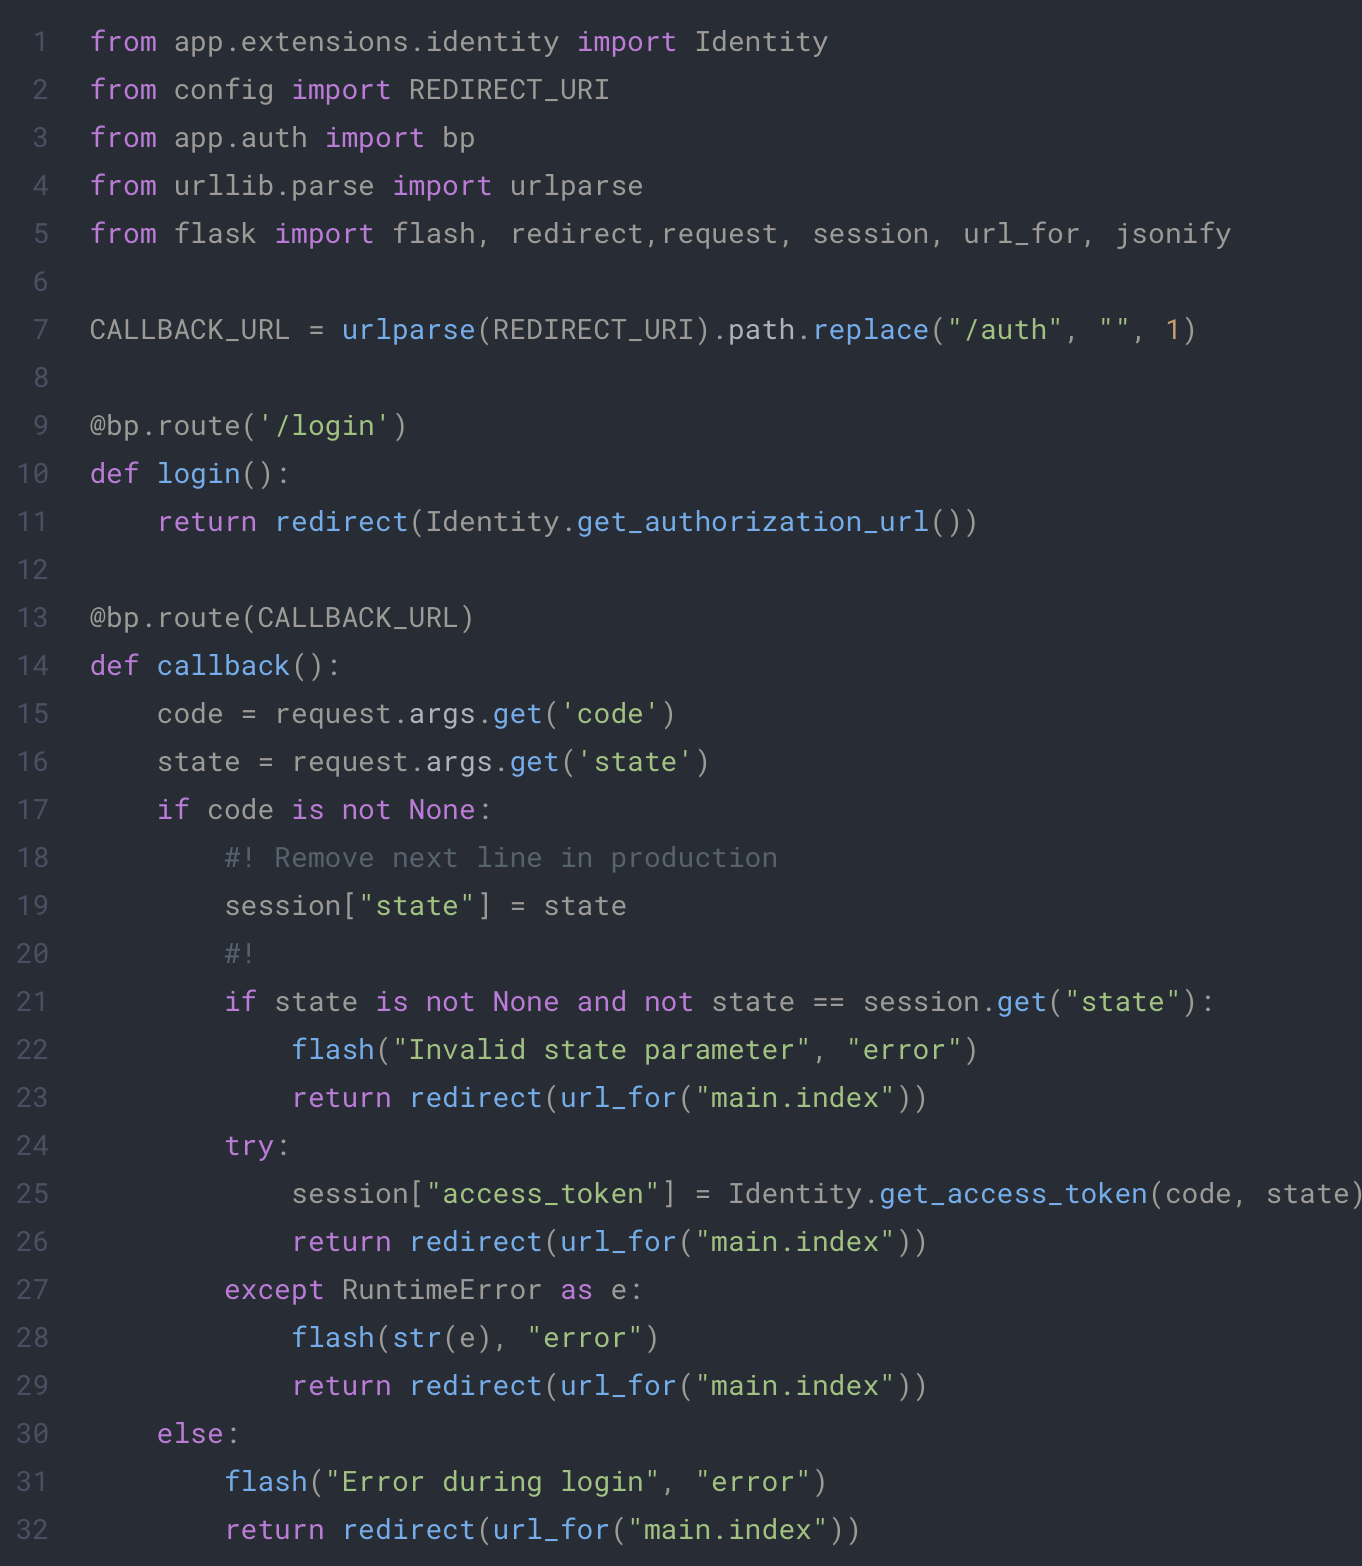
In this code we define two endpoints which will be used by our clients to follow the identification flow. The first one will redirect our client to the provider with the appropriate information. The second one will retrieve the token from the callback of the provider.
Just before testing our program we need two small update to our app:
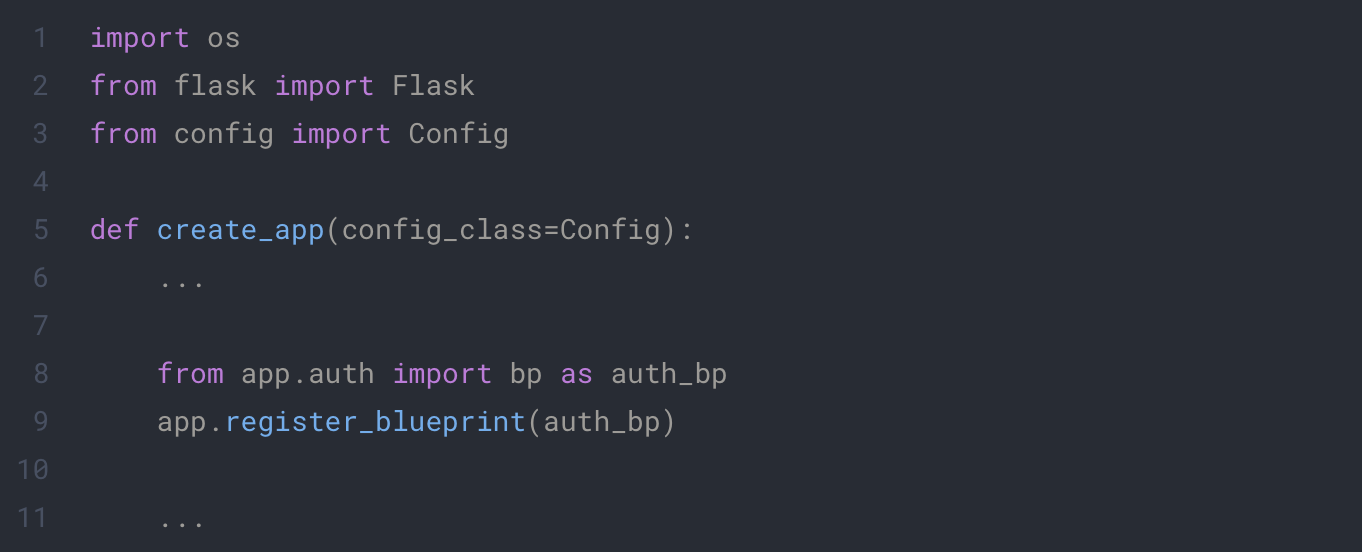
- First we need to add our new blueprint to our app
app/__init__.py
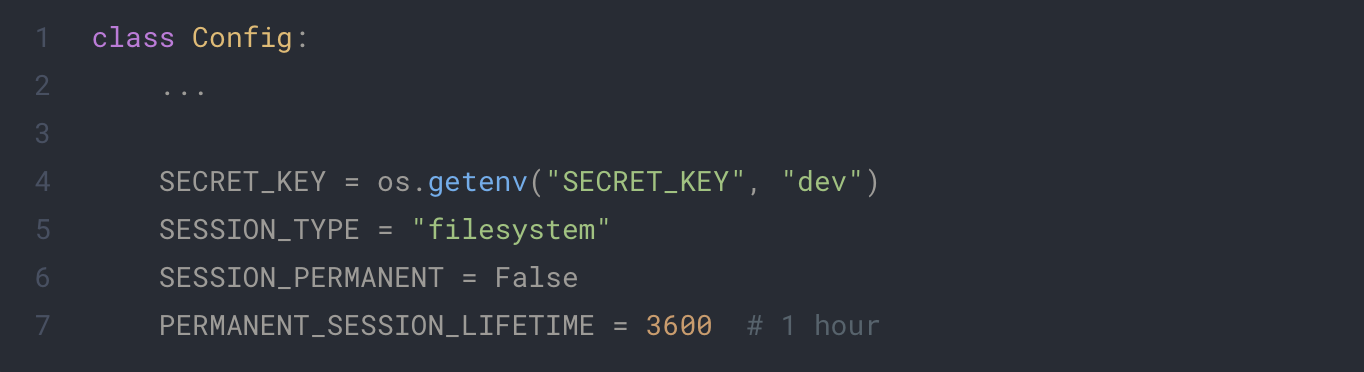
Next we need add parameters inside our configuration to use flask session
config.py
You will also need to install Flask-Session as dependency. You can use the following command:
pip install Flask-Session
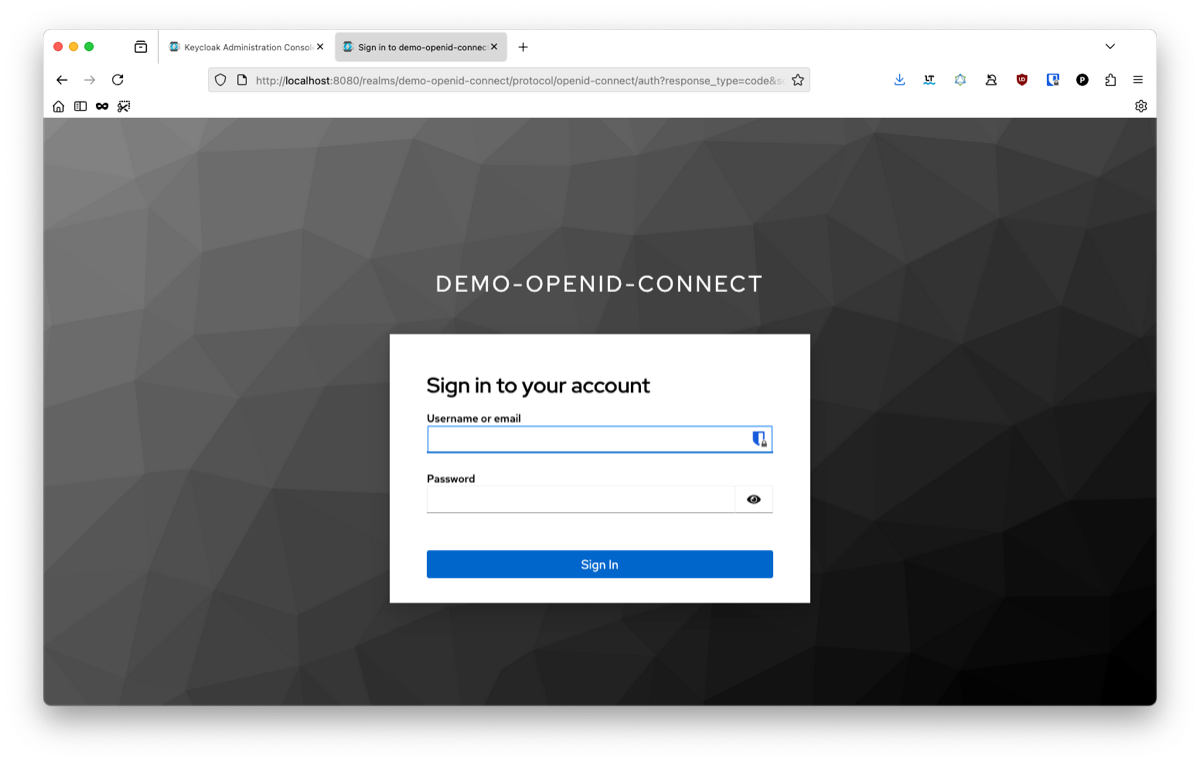
When going to http://localhost:8081/auth/login, you should be redirected to your keycloak and see the following:
To finish our test we will need to add a user inside the keycloak console. Go to the user tab and add one:
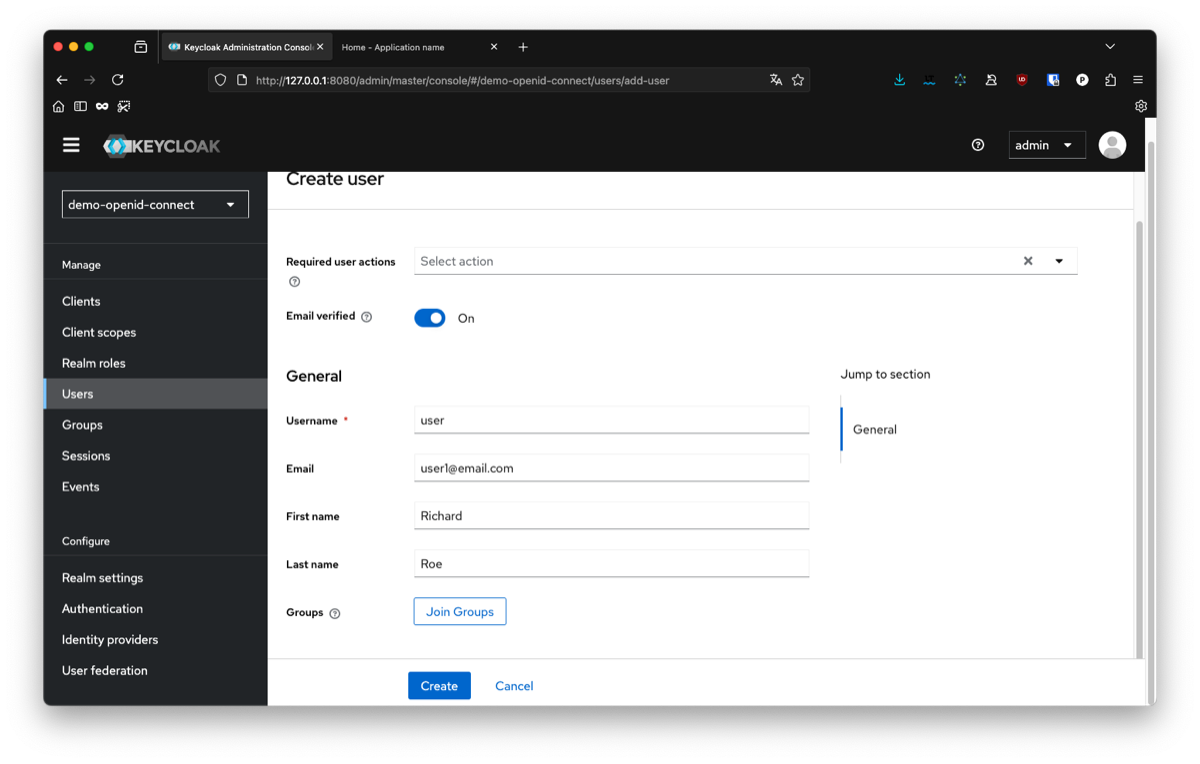
You will also need to set a password from the interface. For this go inside the credentials tab. Return to your app and connect with your user. If everything went fine you should be redirect to your Home page.

If you try to input different information than the one previously used, you will notice that nothing change. The login flow worked, but we don’t access the user information yet. This will be the final step of our guide. If you are curious, you can open the dev console of your navigator and see that you have a cookie session which was created by our authentication flow. For security purpose, we choose to hide the real access token from the client and only give him a reference to the data. This helps avoiding attacks such as token hijacking with an XSS vulnerability in your app.
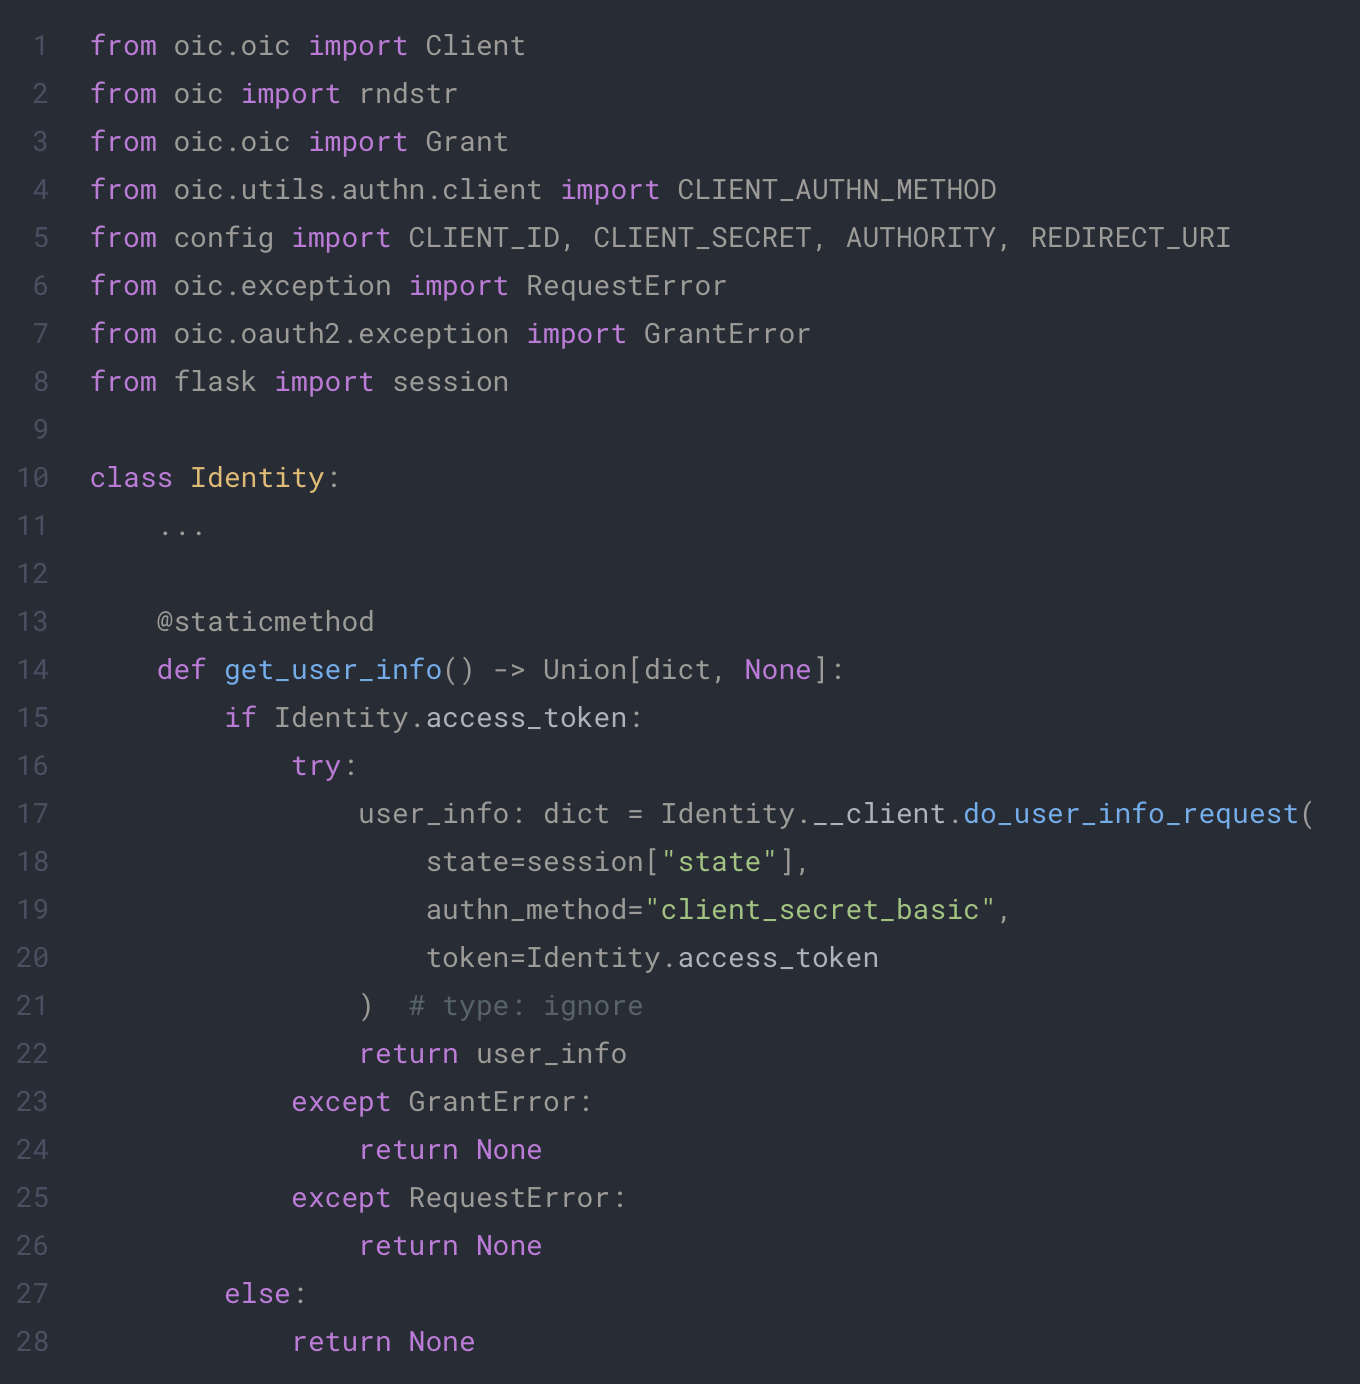
4. Get the user information
All we need now is to be able to retrieve information about our user when he his connected to our app. For this we can call the user information endpoint of our provider with the do_user_info_request method of our oic client. The code will look like this:
app/extensions/identity.py
To use this method, we need to give the token to the request. For this we choose to use a property which will try to get the access_token from the session. Since we only use this class with static method we will need to define a static property.
app/extensions/identity.py
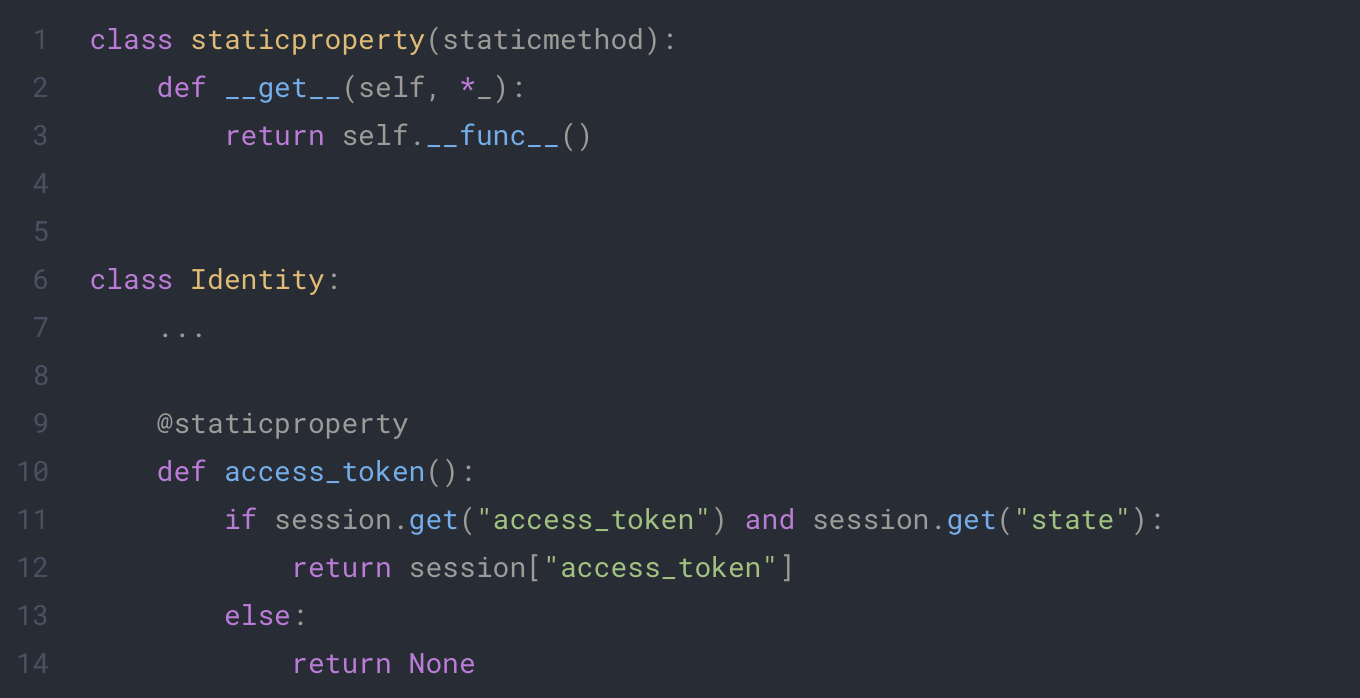
Each time we access our access_token, the script will try to get the token from the session or return nothing.
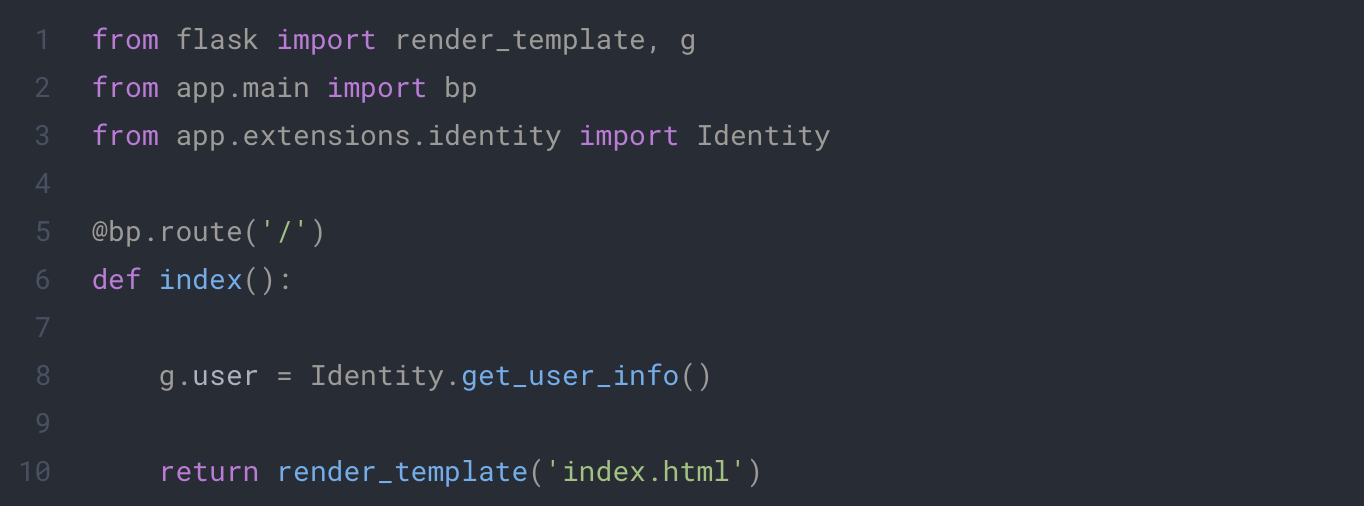
We can now update our home page to display our user information:
app/main/routes.py
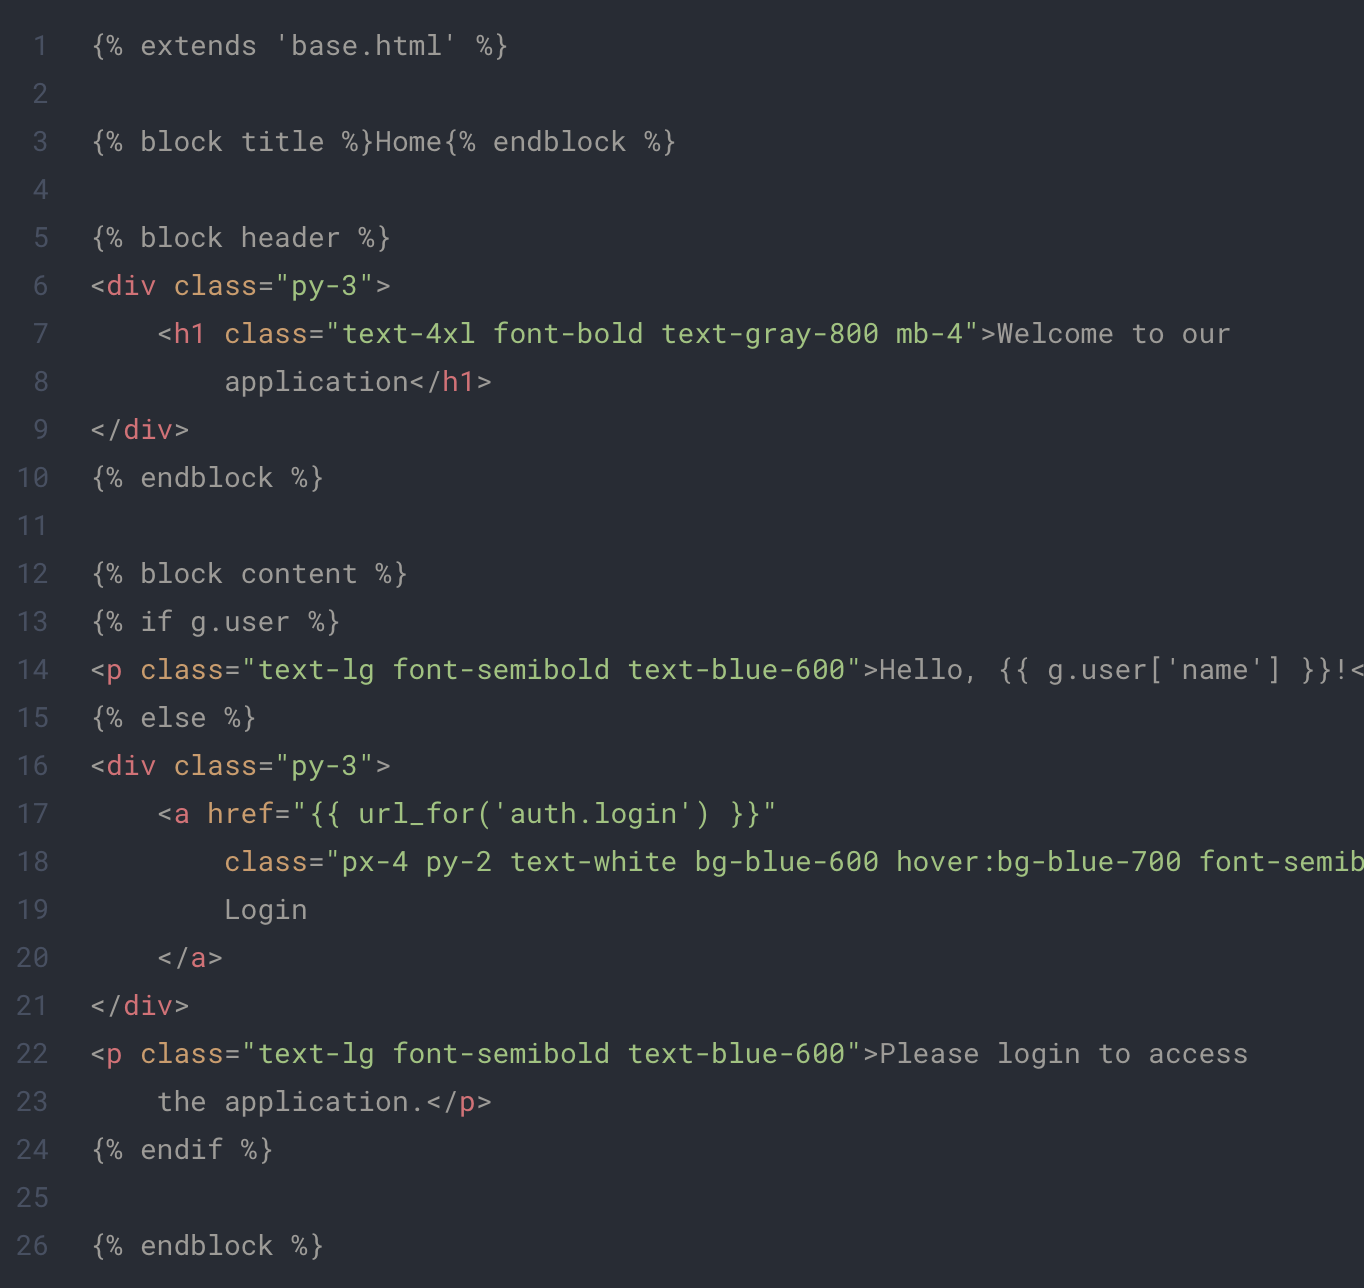
app/templates/index.html
And that’s it! the application finally display our user’s informations correctly. 🥳

To go further
While we finished our authentication flow, you may want to add more functionality such as logging out or protecting endpoint with authentication.
For this we will add the following to our Identity class:
app/extenstions/identity.py
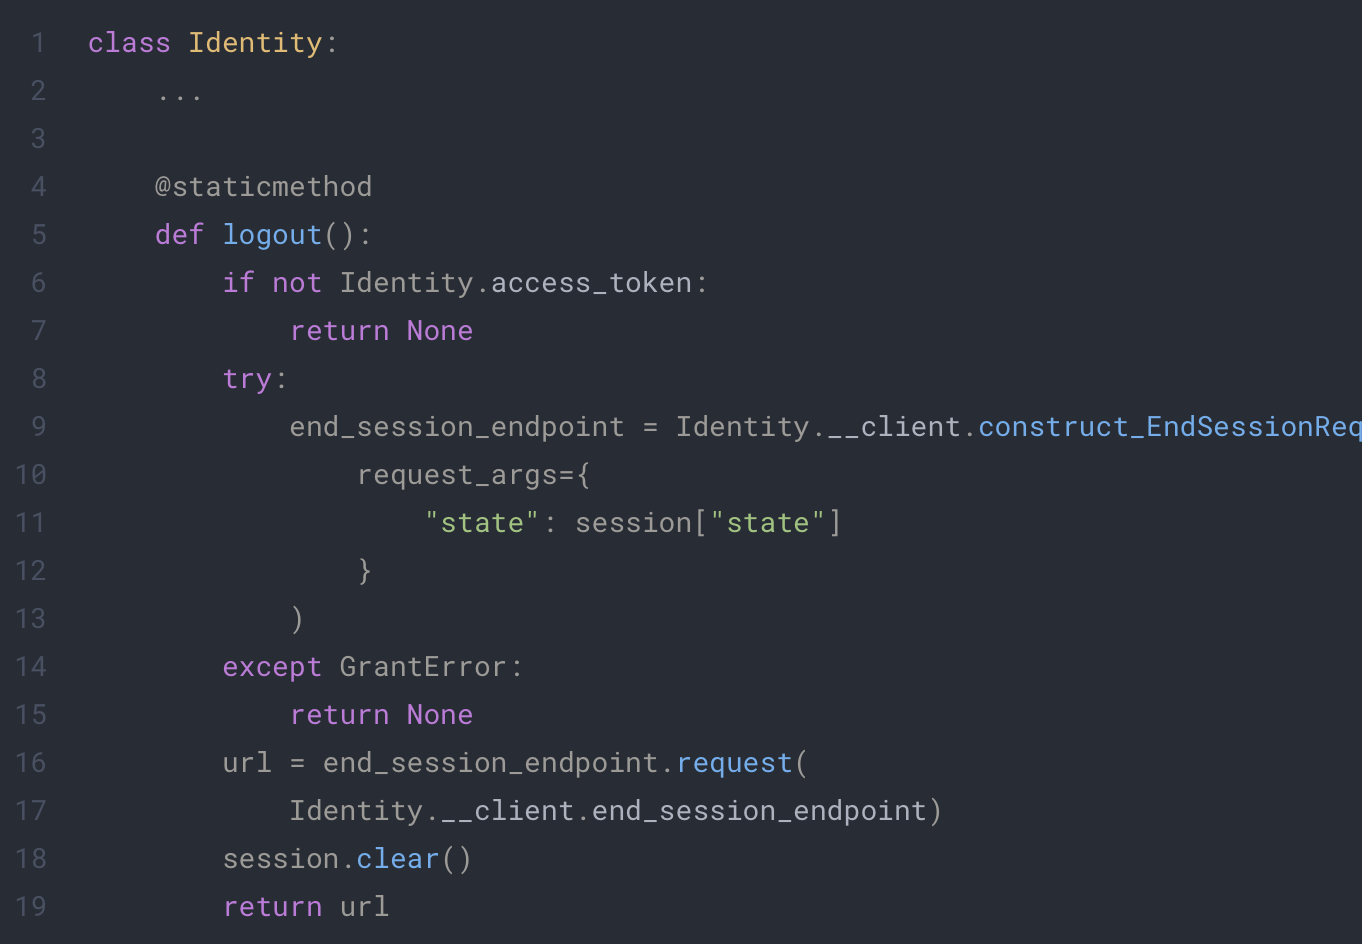
This code will use the oic library to end the session on keycloak and will clear the session on the client side. You can now call this function in your code or create a dedicated endpoint like this:
app/auth/routes.py

For the second part, the best way to secure any endpoint easily is to write a decorator that will do every check for you:
app/extensions/identity.py

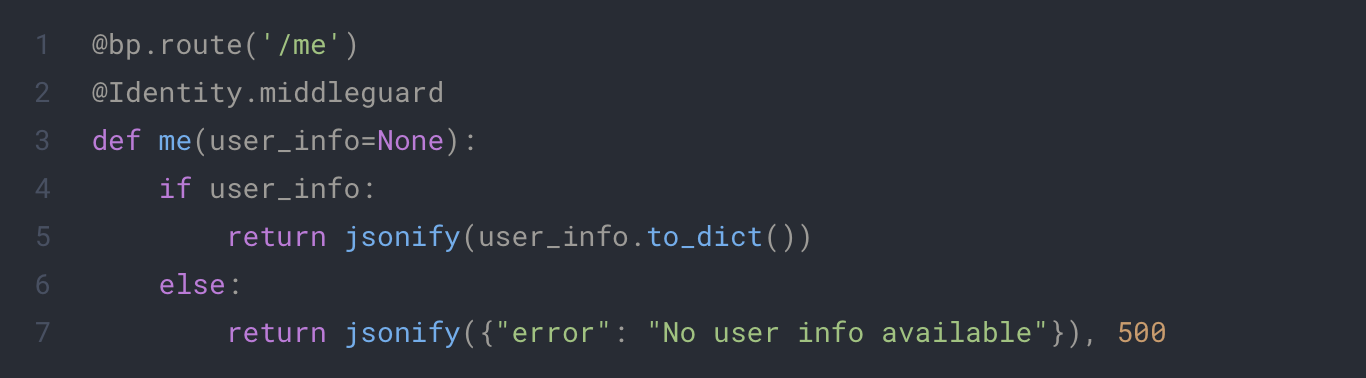
You will just need to put this decorator on any route you want to protect and it will be inaccessible to the client if he doesn’t login first. It will also add the user information as an optional parameter from you function on call. This way you will be able to directly retrieve the information of the user without calling the get_user_info function yourself. Example:
app/auth/routes.py
If you want to learn more about decorator and how to use them, you can check the following tutorial https://realpython.com/primer-on-python-decorators/.
By following this tutorial, you’ve successfully configured Keycloak as an OpenID Connect provider and integrated it with a Python Flask application. You created a secure authentication flow, retrieved user information, and added logout functionality. You also learned how to structure a Flask application for scalability and maintainability.
For production environments, don’t forget to:
- Secure secrets and sessions properly
- Enable HTTPS
- Use strict redirect URI validation
- Implement token expiration and refresh handling
With these foundations in place, you’re ready to extend your app with protected APIs, role-based access control, and much more. 🚀